
Today, most Linux distributions are even easier to install and use than Windows. And yet, when you find yourself troubleshooting a broken driver installation or, as we’ll see in this article, need to recover deleted files on Linux, the friendly face of Tux’s OS might seem like a façade.
Data recovery on Linux can be much more complex than on other operating systems. When seeking help online about particular issues, information can be outdated, referring to much older versions of tools that have since evolved with extra functionality or been replaced by others.
Also, the complexity and diversity of different Linux distributions can make the data recovery process challenging. For instance, each Linux distribution may come with its own selection of backup solutions and data recovery tools, storage devices might be using multiple file systems, and the location of specific files can vary.
Thankfully, we have successfully navigated many data recovery situations in the past. So, let’s explore the best ways to recover lost data on Linux.
Can You Recover Deleted files In Linux?
After they’re gone, you can restore deleted files on Linux, but the process is more complex than on Windows. In the most favorable scenarios, you can undelete Linux files by finding them in the Trash directory. However, it’s much more probable you’ll have to use more advanced tools in the terminal.
In this article, we’ll see how you can easily use such data recovery solutions, primarily for the common EXT family of file systems. The same tools usually also support the most popular Windows file systems, FAT32, NTFS, and exFAT, since they’re often found on removable drives like memory cards you might be accessing from Linux.
Still, with limited time and space, we can’t go over every possible case. Today, if you’re using one of the popular Linux distributions, like Ubuntu, Mint, CentOS 7 etc., and went with their defaults, you’re probably using EXT3 or EXT4. But it’s not a given.
You might be using a file system like ZFS, ReiserFS, or BTRFS, that offer extra features for ensuring your data’s security and health. However, to complicate things further, those features, too, can be optional.
So, we’ll skip those for this article since you might have to use specialized tools to reap better results on such file systems.
If you aren’t using EXT3 or EXT4 or would like to have even more options than the software we’re using in this article, check our guide on the best open-source data recovery software.
Does Linux Have Built-In Backup Utilities?
The term Linux refers to the kernel, the core of the operating system. The kernel is useless for the average user. Various groups build Linux distributions around this kernel, each complementing it with their own choice of additional software.
Since numerous Linux distributions exist, no backup solution is common or considered a standard among them. Some include custom backup solutions, while others offer one or more popular backup tools. A few bare-bones distributions (like Linux From Scratch, Gentoo, and Arch) leave it up to users to choose their preferred backup software.
For example, here are four of the most popular Linux distributions today and the backup tools that accompany their default installation:
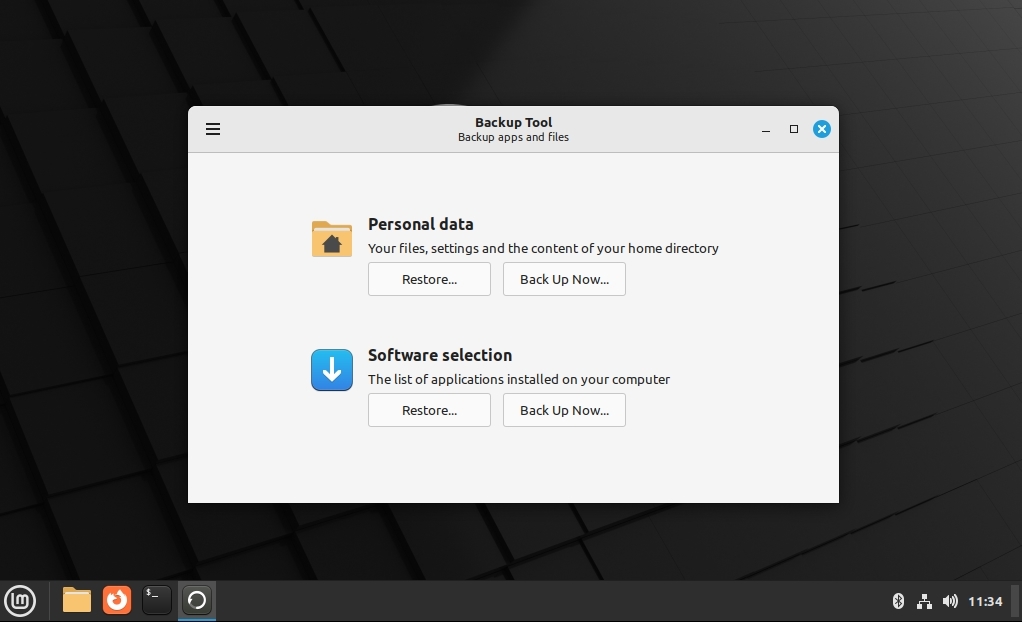
- Linux Mint: Backup Tool
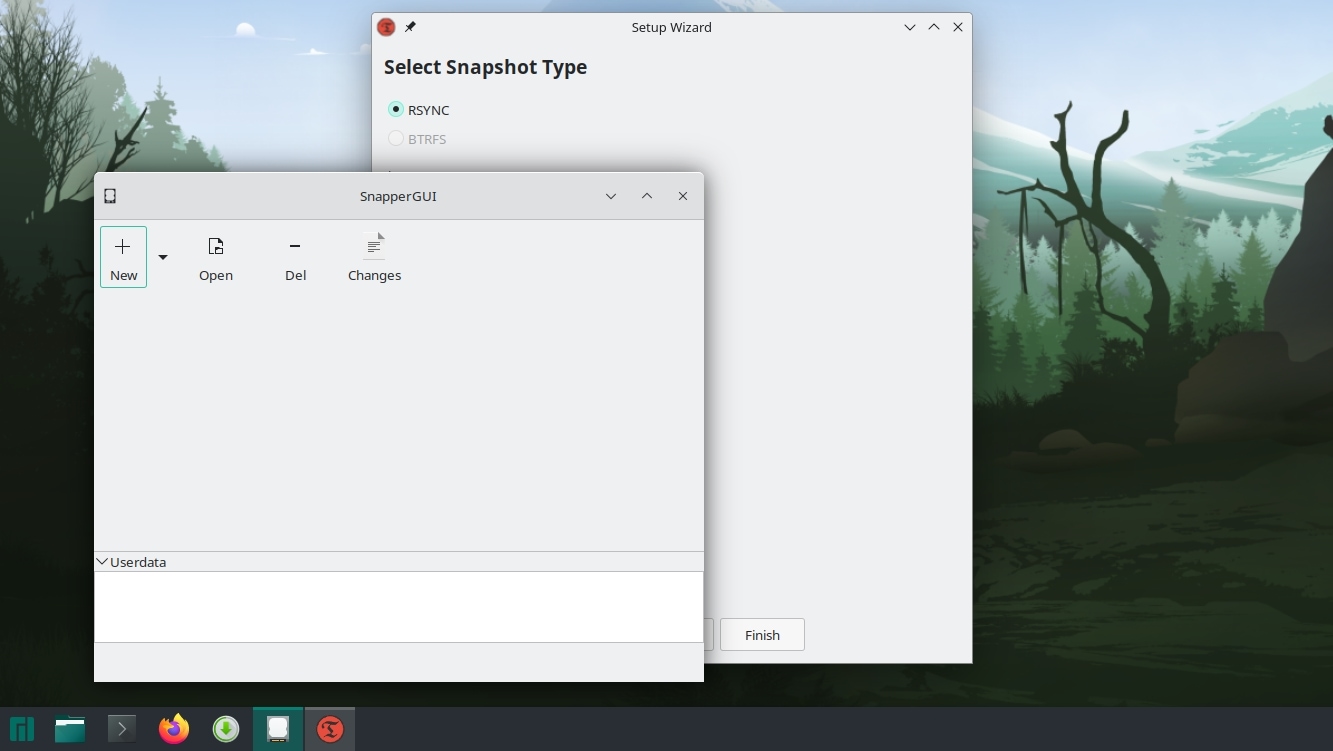
- Manjaro: SnapperGUI, Timeshift
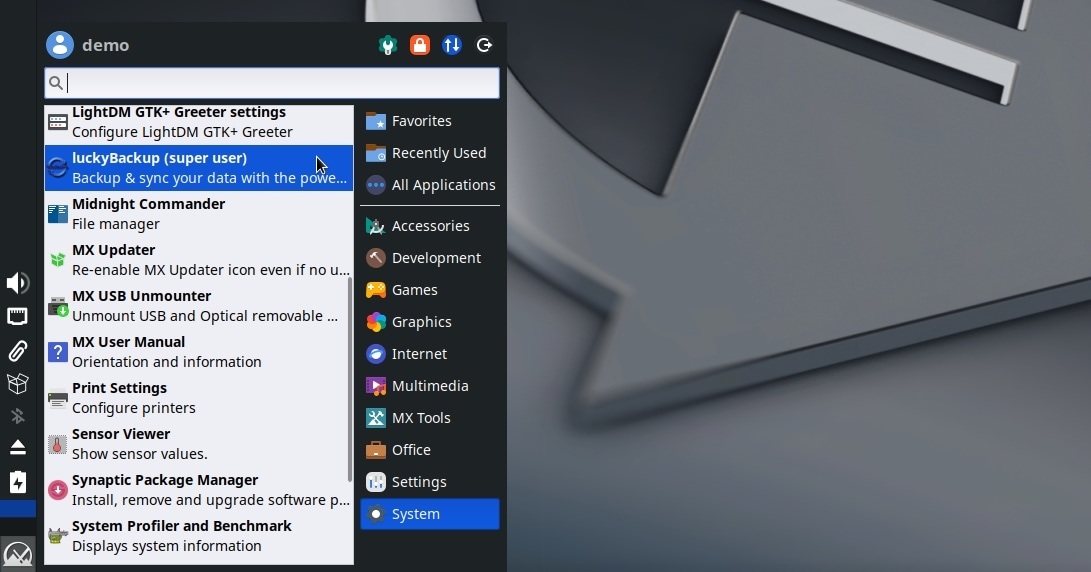
- MX Linux: luckyBackup, Timeshift
- Ubuntu: Backups
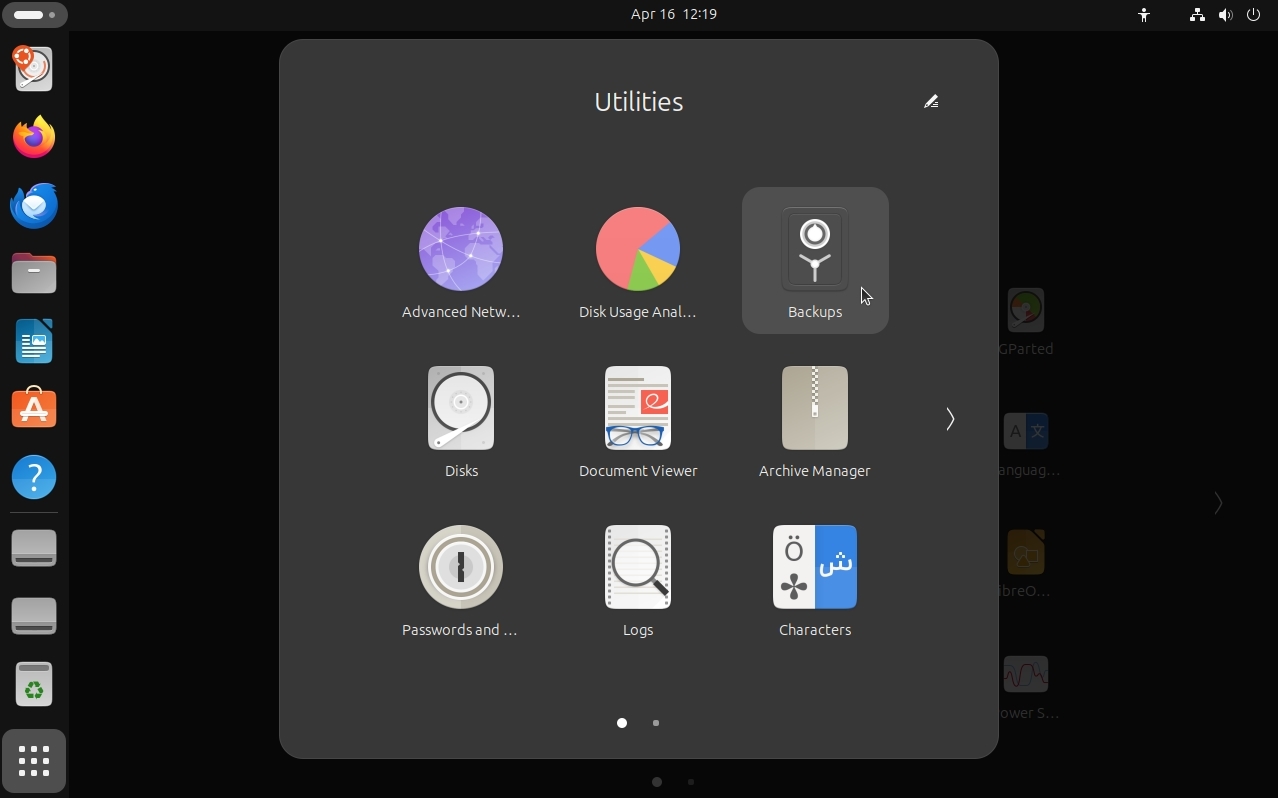
It’s worth noting that most backup tools are incompatible and follow different approaches. For instance, SnapperGUI and Timeshift enable users to take snapshots of the operating system and personal files. This enables reverting those files or the OS to a previous state. In contrast, Linux Mint’s Backup Tool and Ubuntu’s Backups are more traditional backup solutions for duplicating precious files to secondary storage for safety.
Did you switch between Linux distributions and the new one doesn’t come with the backup tools accompanying the previous distribution? Installing the same backup tools from the new distribution’s software repositories (their “app store” equivalent) is usually easy. This allows restoring personal files from any type of backup. However, restoring a complete OS snapshot from an old distribution to a new one is not advisable since distributions differ.
To complicate things further, some file systems widely used in Linux, like BTRFS, also come with built-in support for keeping multiple versions of the same files. Since this allows reverting individual files to previous states using specialized tools, it can be considered an alternative to standalone backup solutions.
Things to Keep in Mind Before You Begin Linux File Recovery
Every single write to the storage device from which you are trying to recover data reduces your chances of getting that data back in usable condition.
That’s why you should unmount the partition from which you want to undelete Linux files and mount it back as read-only before any attempt to recover deleted files on Linux.
If you want to recover data from your root partition, which contains all the files and directories of your Linux OS installation, it’s impossible to unmount it while “inside” the running OS. In such a scenario, you can boot your PC from a live CD or USB drive to scan your root partition. The methods we see in this article should largely remain the same when using your actual Linux installation or a live environment.
You can do that by using the following commands:
sudo umount /dev/sdc2
sudo mkdir /media/device-to-scan
sudo mount -o ro /dev/sdc2 /media/device-to-scan
To disassemble those into their parts:
- sudo is the terminal command for executing other commands as an administrator (“root”).
- umount unmounts the “second partition (2) of the third device (sdc)”.
- mkdir creates the directory “/media/device-to-scan“, which can then be used as the mount point for remounting the device.
- mount -o ro mounts the device “/dev/sdc2” to the directory “/media/device-to-scan” as read-only.
To be even safer, it’s best to clone the device you want to scan to another device or an image file.
To do that, use the dd command:
sudo dd if=/PATH/TO/SOURCE/DEVICE of=/dev/PATH/TO/TARGET/DEVICE/OR/IMAGE
For example, let’s say we want to clone the second partition of the third storage device into the “backup.img” backup image stored directly in our home folder. The command for that would be:
sudo dd if=/dev/sdc2 of=$HOME/backup.img
Alternatively, you can use a solution like CloneZilla, for which you can read more in our article on the best backup and recovery software.
By having a backup, even if your storage device fails before you manage to recover files on Linux, you’ll still have them safe in the cloned image.
If all this already sounds like “too much”, and you’d prefer a more straightforward (and click-friendly) solution, check our article on the best data recovery apps.
How to Recover Deleted Files On Linux
Most Linux distributions originate from a handful of “parent” distributions. Although they’re (mostly) similar and compatible, they also have some differences. They might use their own directory structure, tools, etc.
So, even if you seek Ubuntu data recovery software, the apps you’ll find are actually compatible (and available) with all Linux distributions.
Still, this article will look at how you can recover deleted files on Ubuntu and other distributions based on Debian, like Linux Mint. Expect minor variations to what you’ll see here if using a distribution from a different “family”, like SUSE, Arch Linux, etc.
Method 1: Retrieve Deleted Files From Trash
Like Windows’ Recycle Bin, Linux’s Trash is a system-level folder where all deleted files are moved temporarily for a predefined period. If you get to them before this time runs out, you can restore deleted files on Linux without using the terminal or third-party software.
In modern Linux distributions, the Trash folder is usually accessible directly from your desktop.
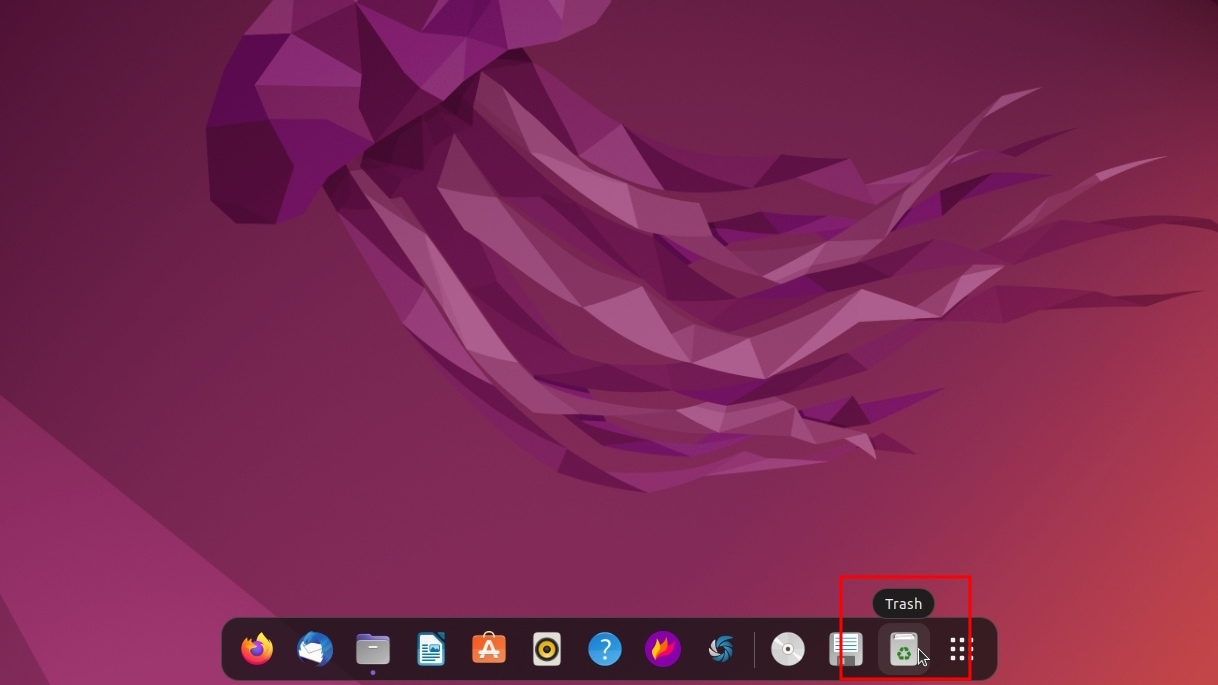
For example, to get your files back out of the Trash folder on Ubuntu:
- Click on the trashcan icon on Ubuntu’s toolbar to access the contents of the Trash folder using the default file manager.
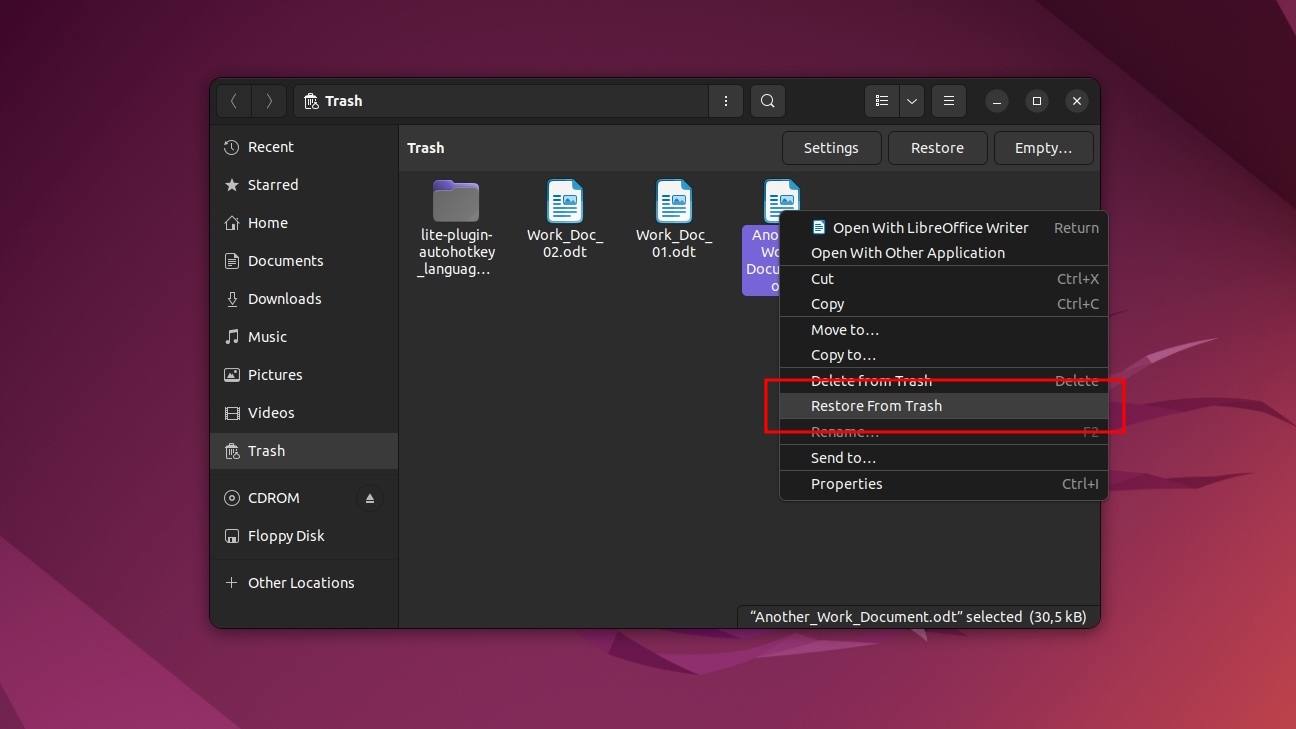
- Select the files or folders you want to recover, right-click on them, and select Restore from Trash.
Method 2: Repair Corrupted Partition Using TestDisk
Is it not a handful of files you are missing, but all of them? Does the device or partition where they were stored appear as empty, RAW, or otherwise inaccessible? Then, you don’t need to recover files on Linux individually but to check and fix file system errors. And TestDisk can help with that.
TestDisk can analyze most storage devices, from internal hard disk drives to the SD cards you use with your camera. It can locate and recover, fix, or rebuild the most popular file systems, from Linux’s native family of EXT filesystems to FAT32 and NTFS as used on Windows. To learn more about the app, check our in-depth TestDisk review.
Is a corrupted data structure the only problem that rendered your data inaccessible? After TestDisk is done, the disk you “fix” with it – and all your files on it – should be accessible again.
To fix a corrupted storage device with TestDisk on Ubuntu, Mint, or any other Debian-based Linux distribution:
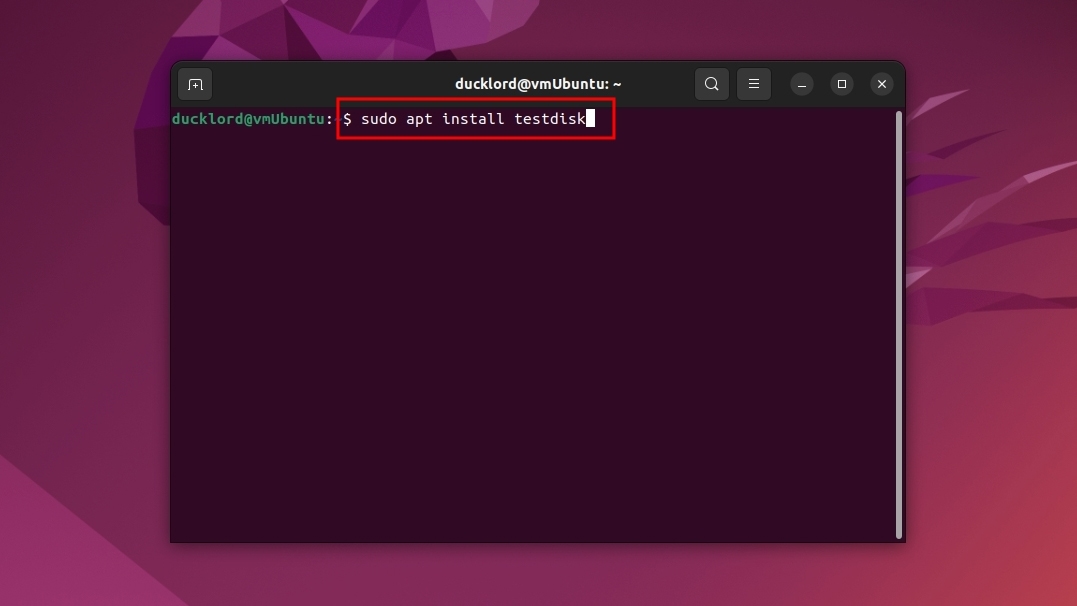
- If TestDisk wasn’t bundled with your distribution, install it using the command sudo apt install testdisk.
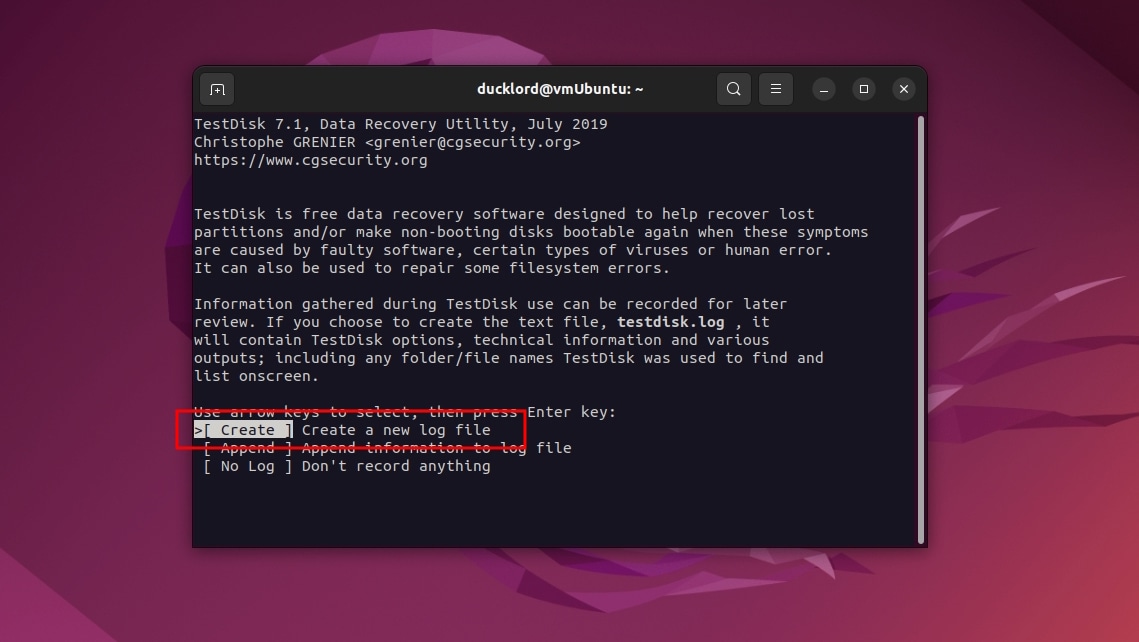
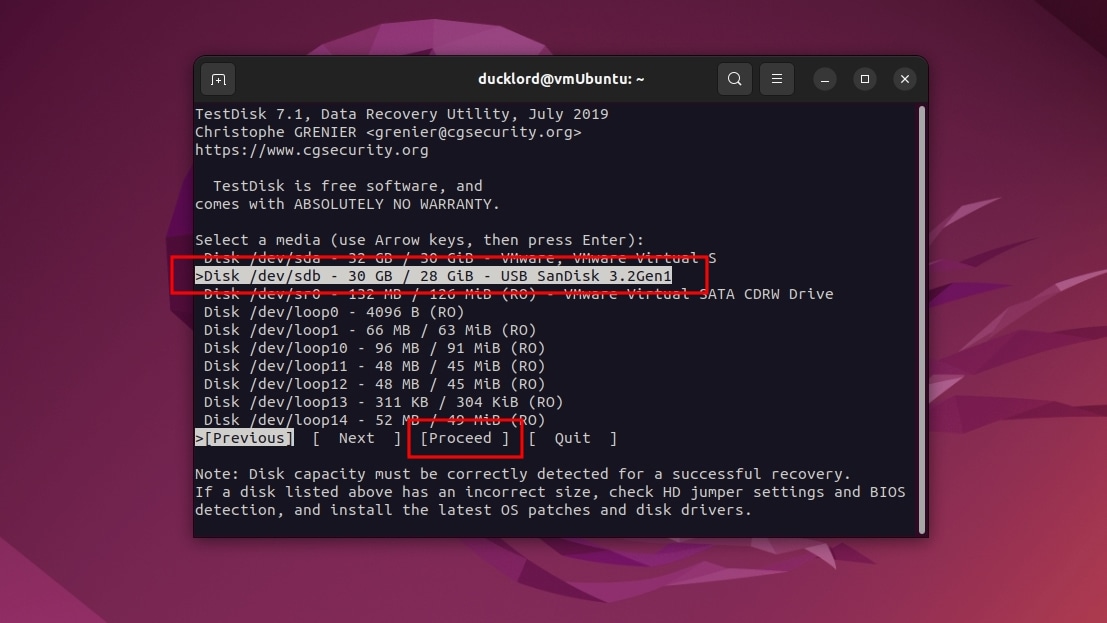
- Run the app with sudo testdisk in your terminal. Select Create to create a new log file, which may help with troubleshooting if things don’t go as intended.
- Use the up and down cursor keys to highlight the device you want to scan from TestDisk’s media list and the left and right cursor keys to highlight Proceed, followed by Enter.
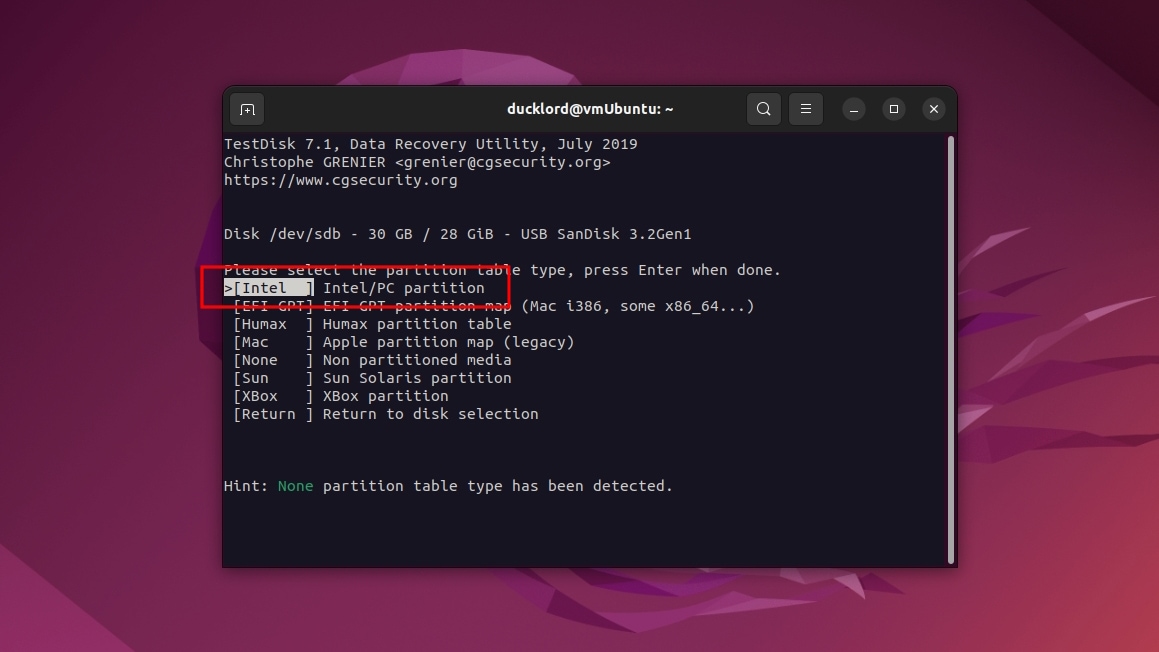
- Select the correct partition table type for your device. In most cases, you should go for Intel.
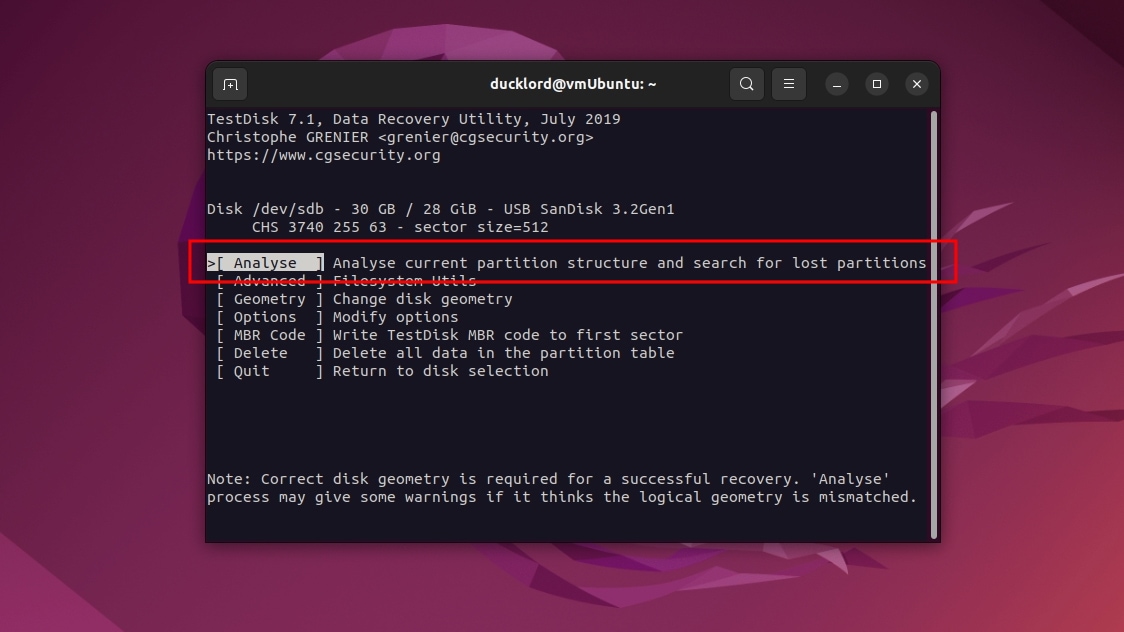
- Select Analyze and press Enter to check your storage device for lost partitions.
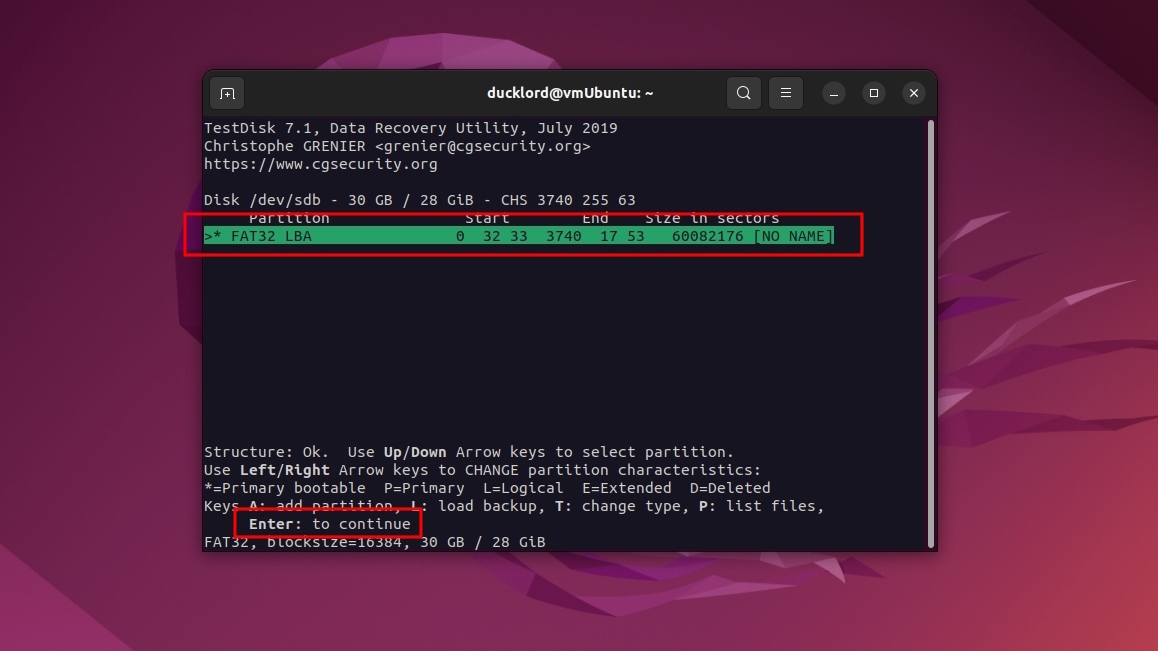
- TestDisk will show you the current partition structure. Highlight Quick Search and press Enter to look for more.
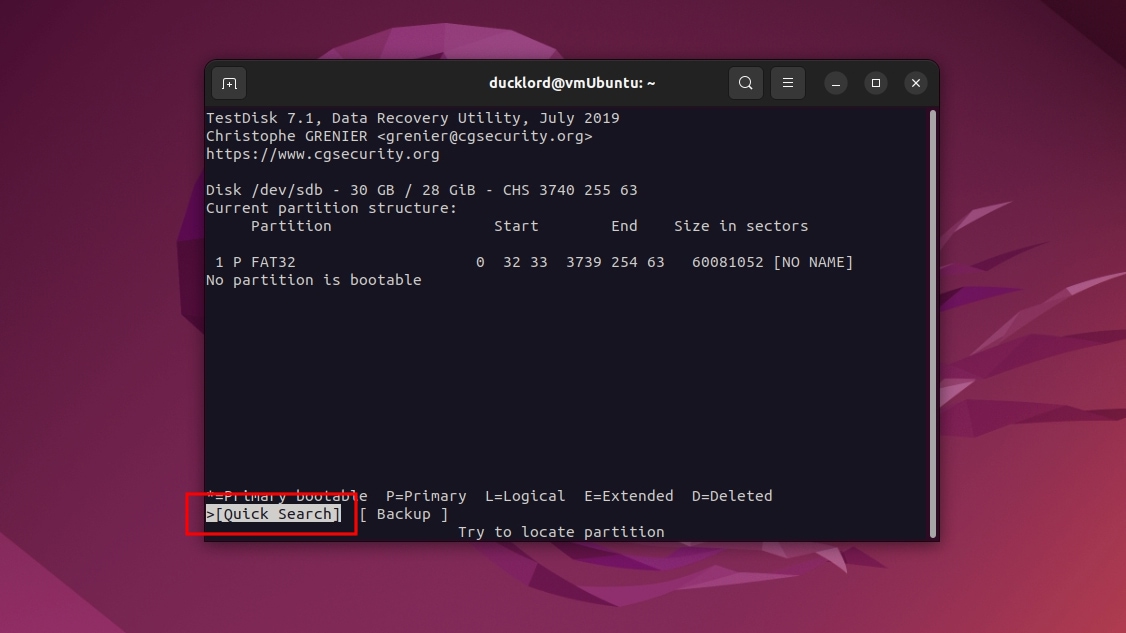
- TestDisk found only one partition on our drive, but it might locate more on yours. Highlight the correct partition and hit Enter to continue.
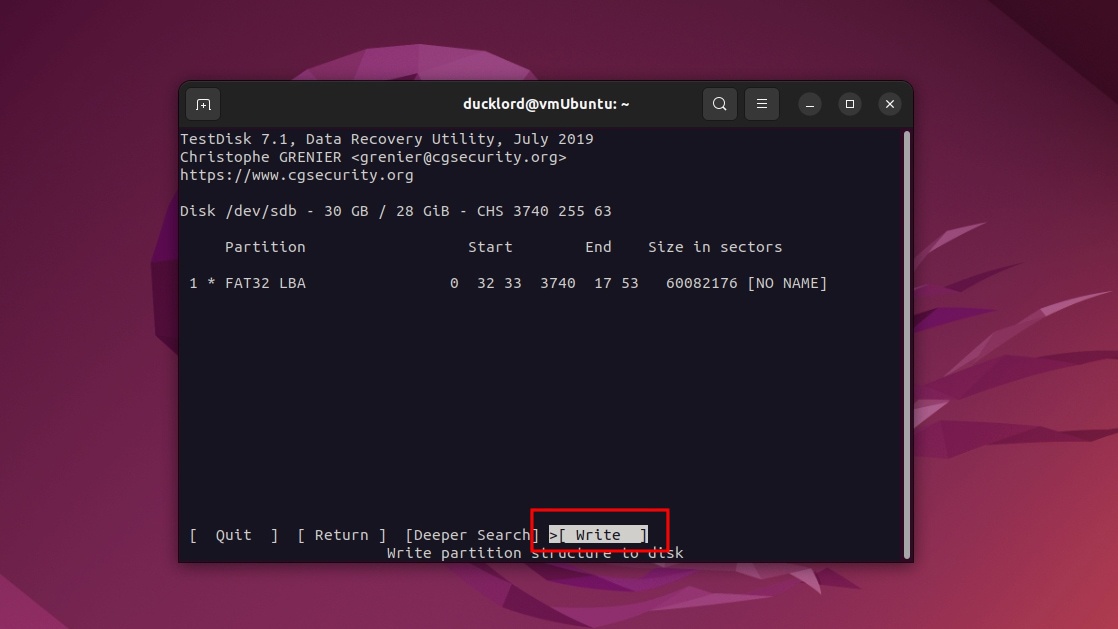
- TestDisk will show you the new partition table. If you are happy with it, highlight Write and press Enter.
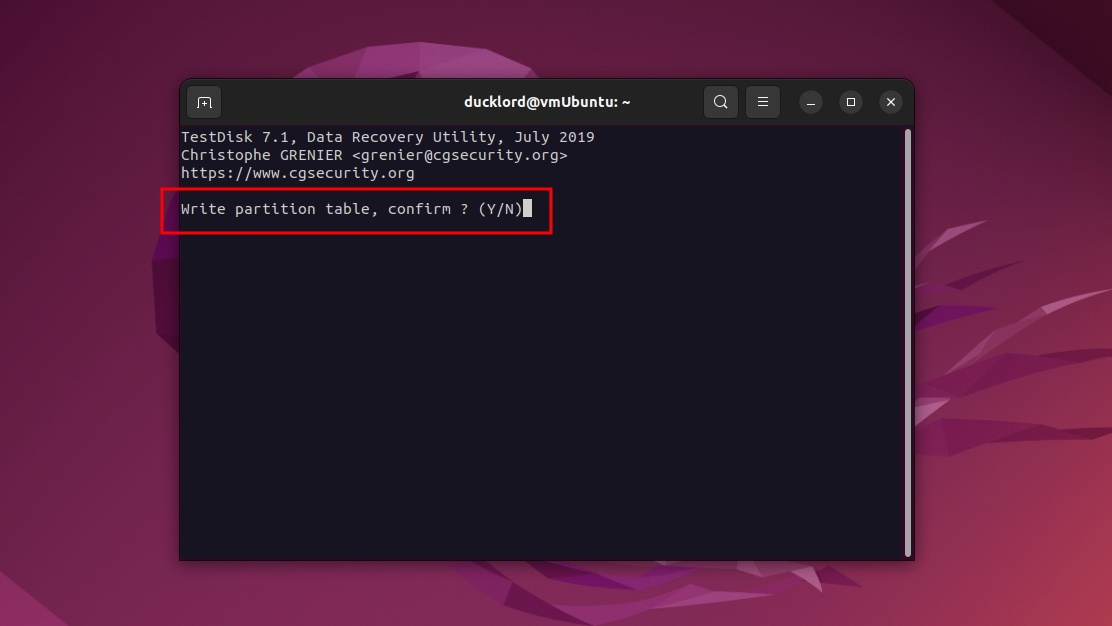
- If you are sure you want to write the new partition table to the device, answer positively when asked about it.
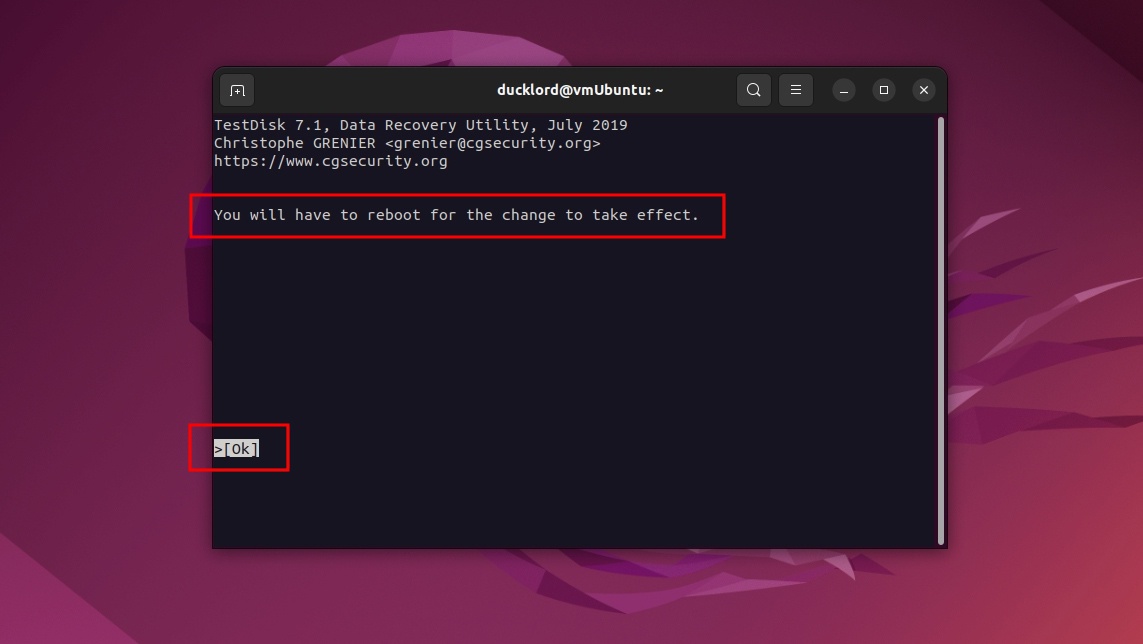
- If, for some reason, TestDisk can’t apply the necessary changes to your device, it will inform you that a reboot is needed.
Method 3: Recover Permanently Deleted Files With PhotoRec
Were the contents of a folder accidentally deleted using the rm -rf command? There’s no “undo rm” button that can bring everything back to how it was, but you may save most of your lost files as long as you act quickly. Your files won’t be gone until they’re overwritten. And PhotoRec, which we’ve reviewed in the past, can find them.
PhotoRec is bundled with TestDisk, which we’ve covered above, so we’ll skip its installation. As you’ll see in action, both apps are similar but achieve different goals.
Master PhotoRec for recovering files deleted by rm -rf with these steps:
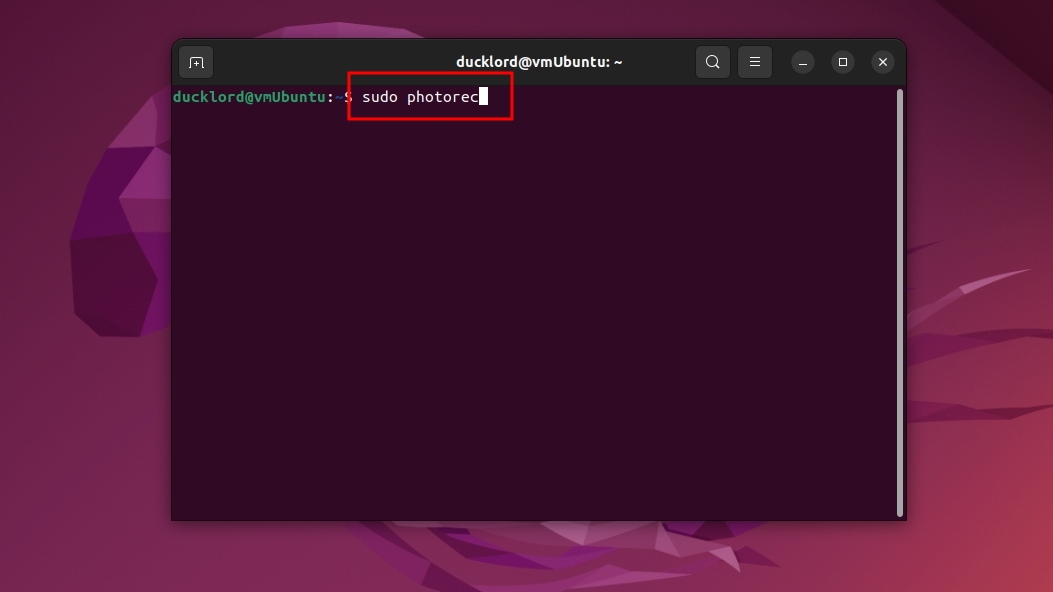
- After you install TestDisk, you’ll also have PhotoRec available. So, launch it from your terminal with sudo photorec.
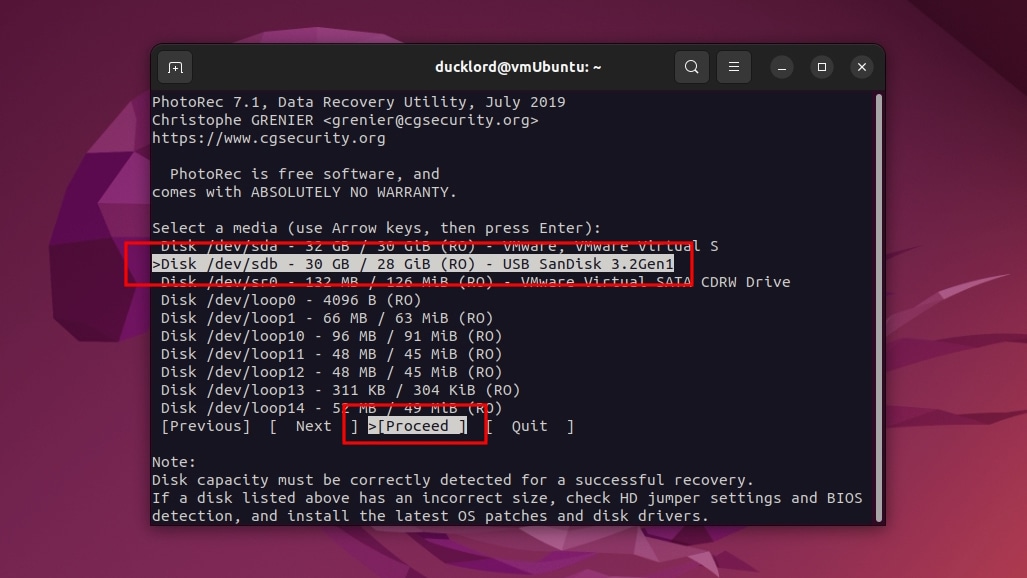
- From PhotoRec’s media list, select the device you want to scan for lost files. Highlight Proceed and hit Enter.
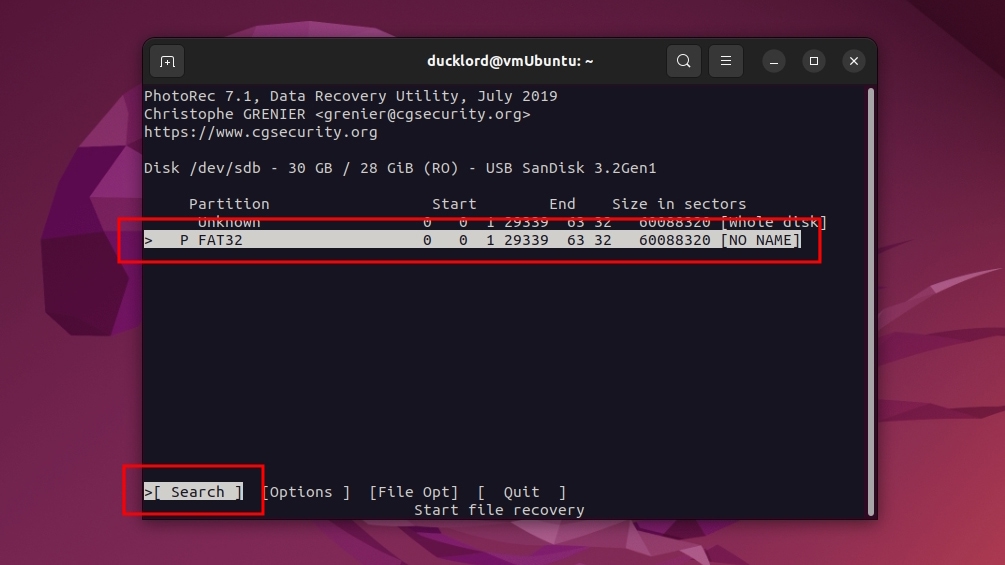
- Highlight the partition you want to scan (in our case, there was only one), and with Search selected, press Enter.
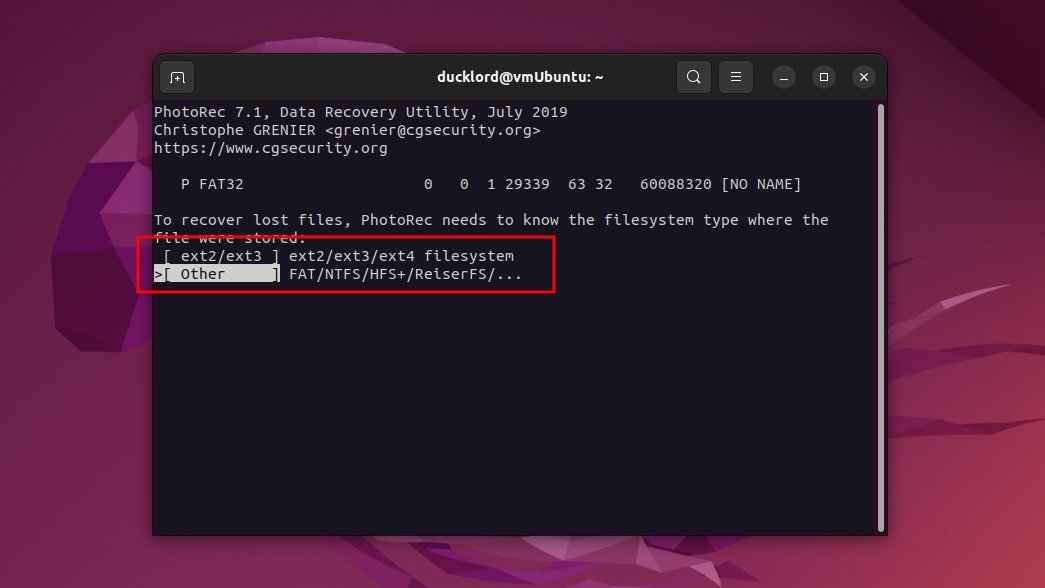
- Choose the correct filesystem type for the device. Go for ext2/ext3 for the EXT family of Linux filesystems (including the latest, EXT4), or Other for any other filesystem. “Other” covers non-EXT Linux filesystems (like ReiserFS) and those primarily used on other OSes, like the Mac-friendly HFS+ or Windows’ FAT32 & NTFS.
- Choose Free if you want to quickly scan only the unallocated space for lost data, or Whole for seeking files on the whole device with a more thorough but slower scan.

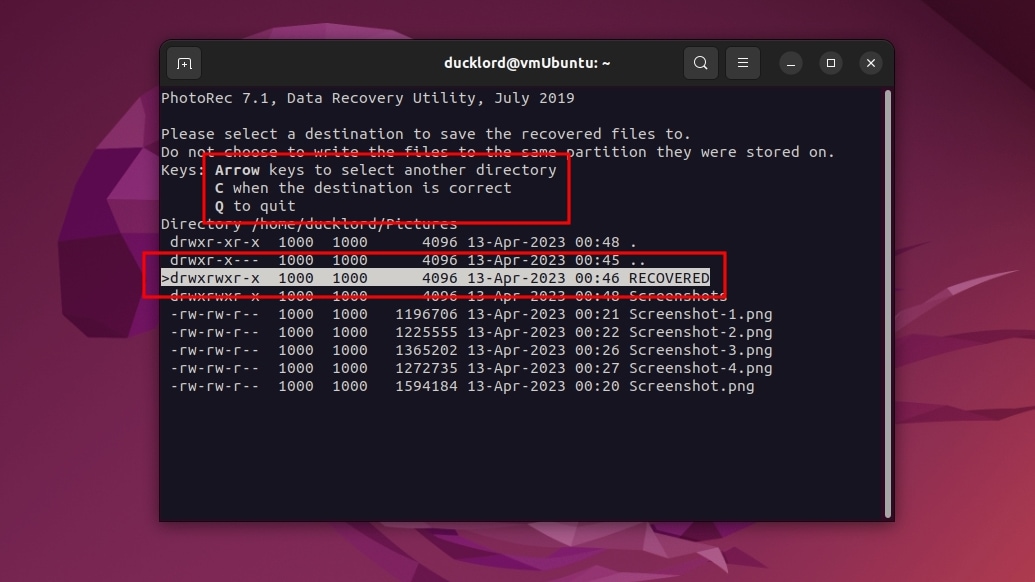
- Select a destination directory where PhotoRec will store the recovered files. You can navigate the list with the up and down cursor keys. You can enter a highlighted directory by pressing Enter and return to the previous level by selecting the two dots at the top of the list. When you’re “in” the folder where you want to store the recovered files, press C.
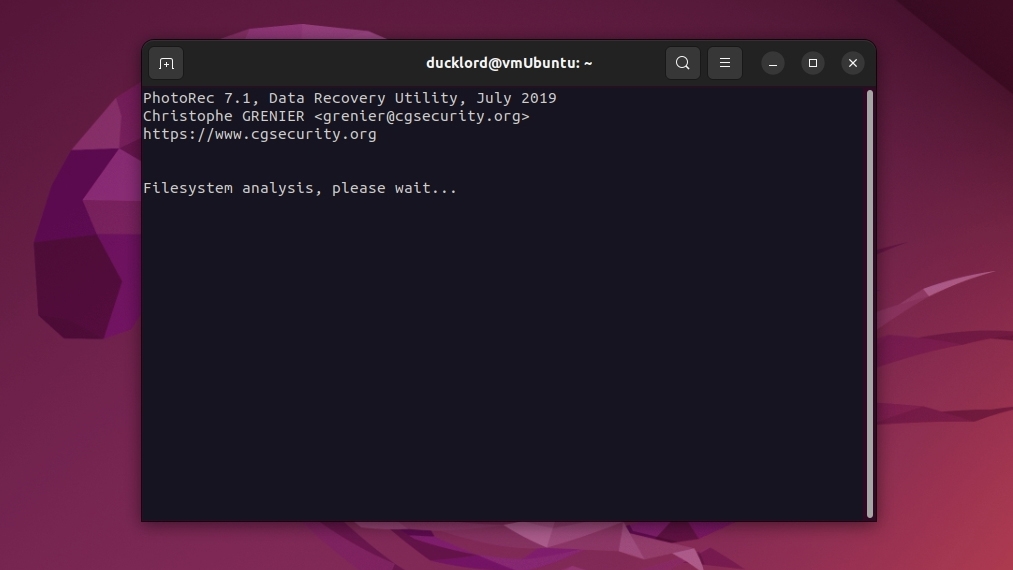
- PhotoRec will first analyze the filesystem.
- Then, it will start recovering any files it finds to the destination folder you selected.

- PhotoRec will inform you about the outcome of the process, giving you a single option to select: Quit.
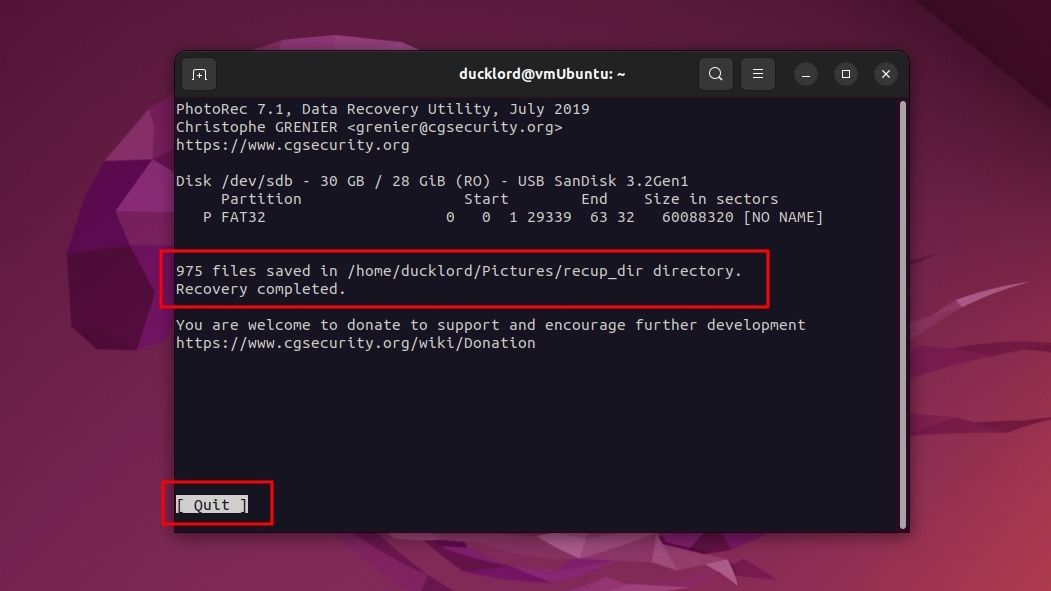
- You’ll find your files in the directory you selected as the recovery’s destination.

Unfortunately, if you find thousands of nonsensically-named files dumped in the destination folder, that’s the nature of PhotoRec. The app doesn’t recover the original file names or any folder structure.
Another issue is that although PhotoRec supports an impressive range of file types, it’s still limited compared to many other data recovery solutions. So, it may be unable to locate unpopular file types.
Method 4: Undelete Linux Files Using Foremost
Foremost is one of the most versatile and customizable data recovery solutions. Since it’s open source, it’s also free to use.
As it’s primarily a tool for professionals, Foremost is far from the most user-friendly piece of software.
Still, if you don’t need the app’s advanced functionality, a simple data recovery with Foremost is relatively straightforward:
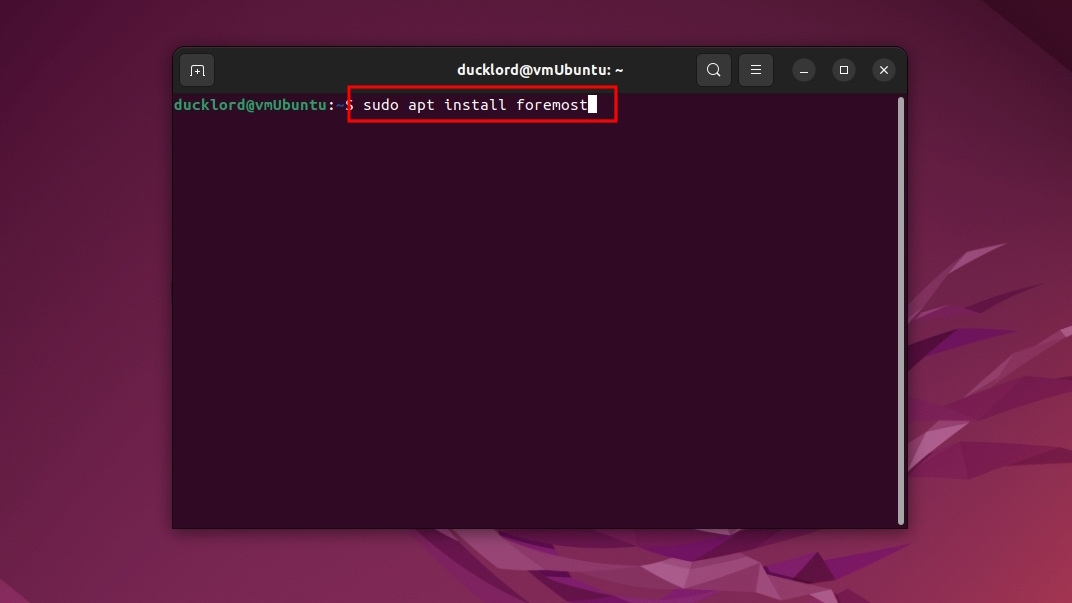
- Foremost isn’t bundled with most Linux distributions but should be available in their repositories. To install it from there, fire up your terminal and use the command sudo apt install foremost.
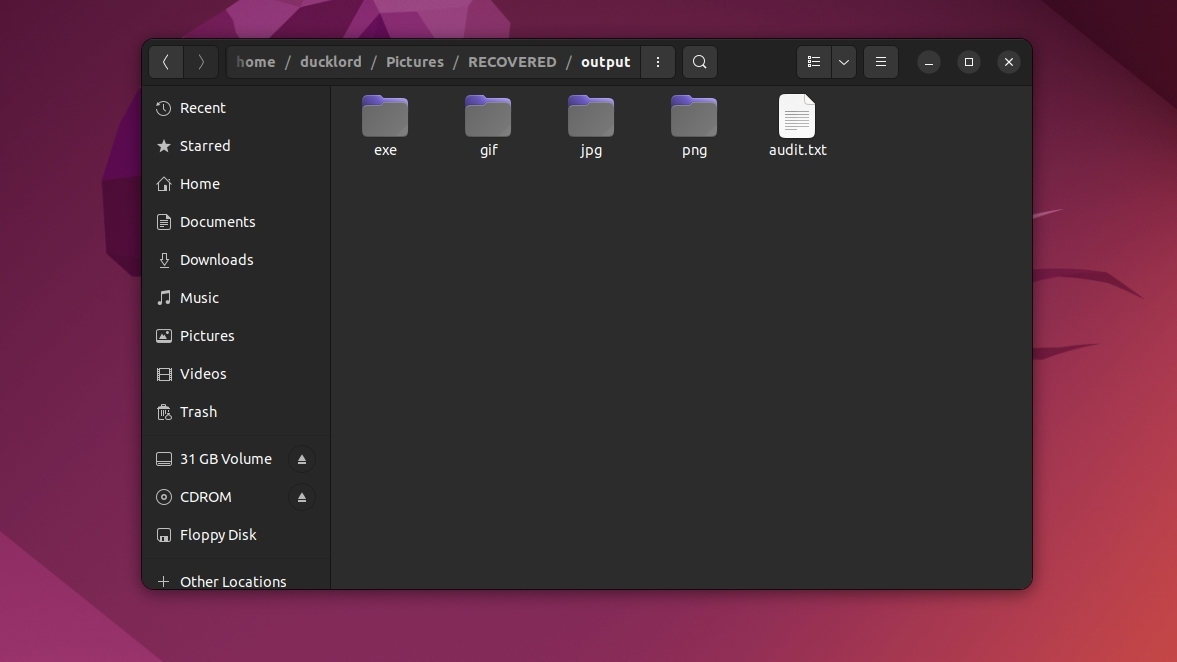
- Create a folder where you want to store your recovered files (you can use the command mkdir), and then enter it (using the command cd).
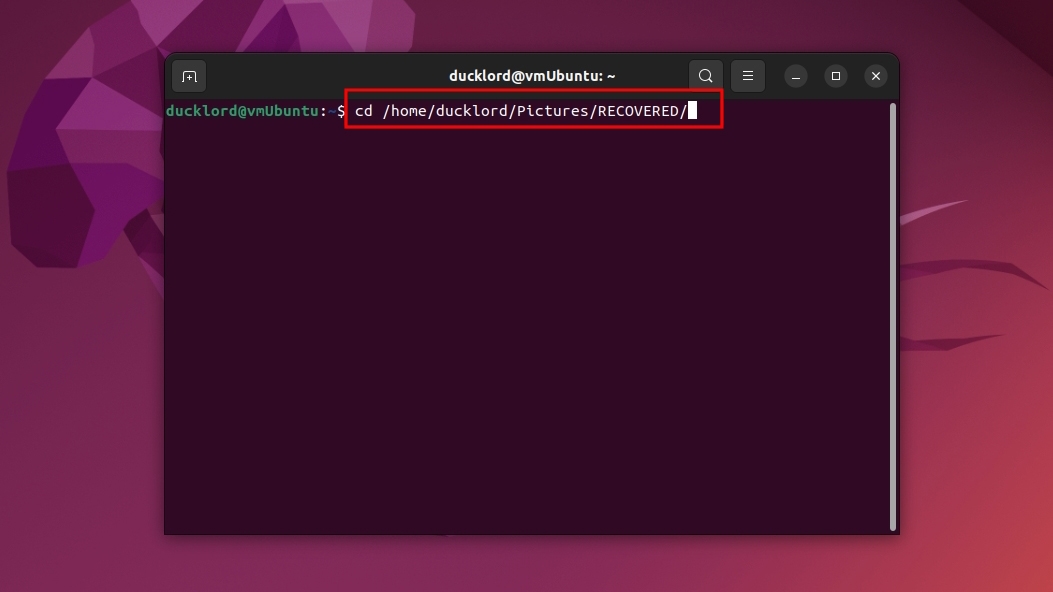
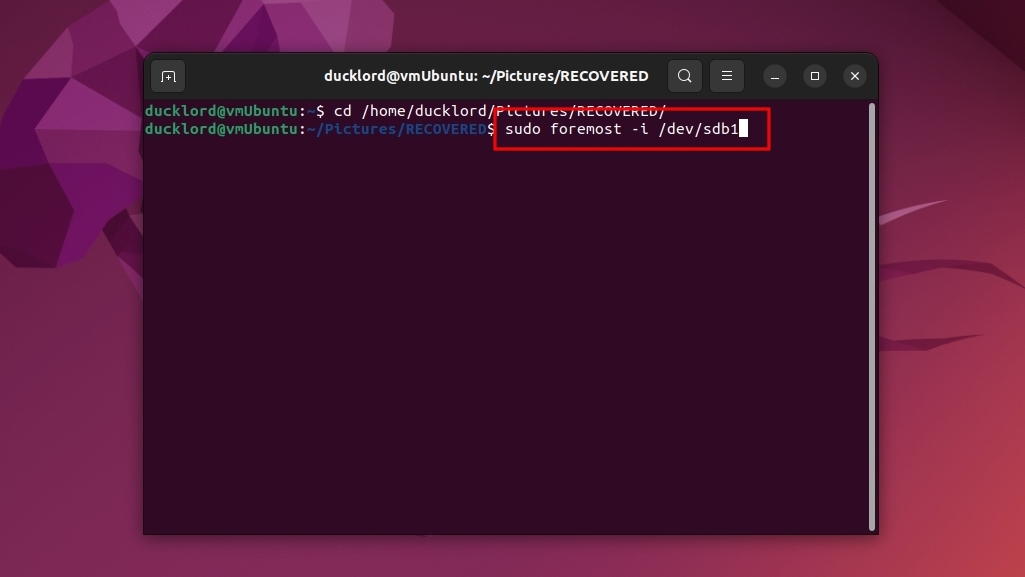
- Launch Foremost using the command sudo foremost-i /device/you/want/to/scan. For example, to recover deleted files on Linux from the first partition of the second storage device, use the command sudo foremost-i /dev/sdb1.
- Give Foremost some time to scan your disk for lost data.
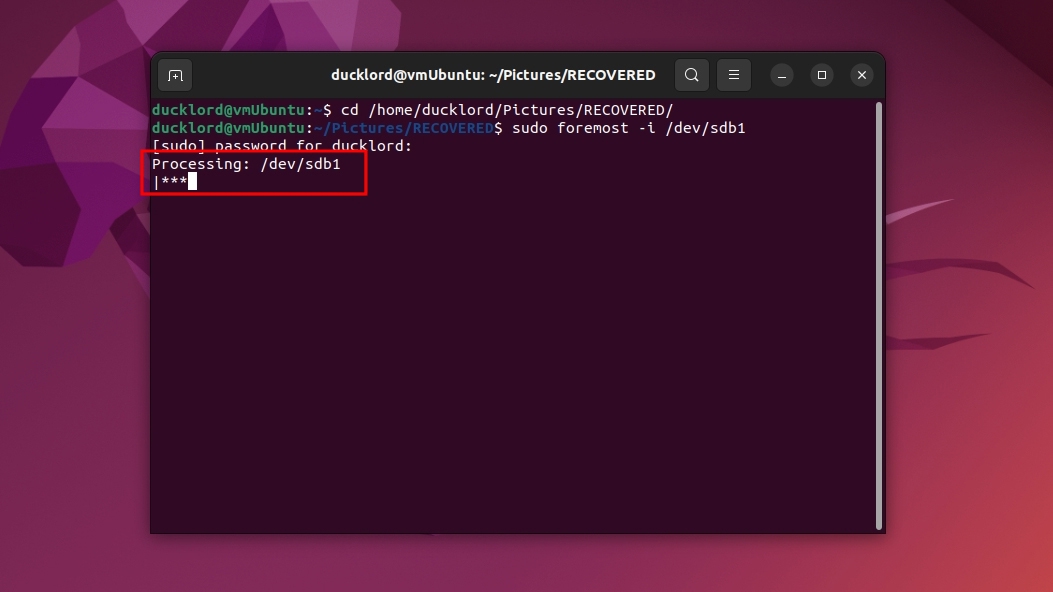
- Foremost will start saving inside the directory you created, every deleted file it locates on the device it’s scanning.
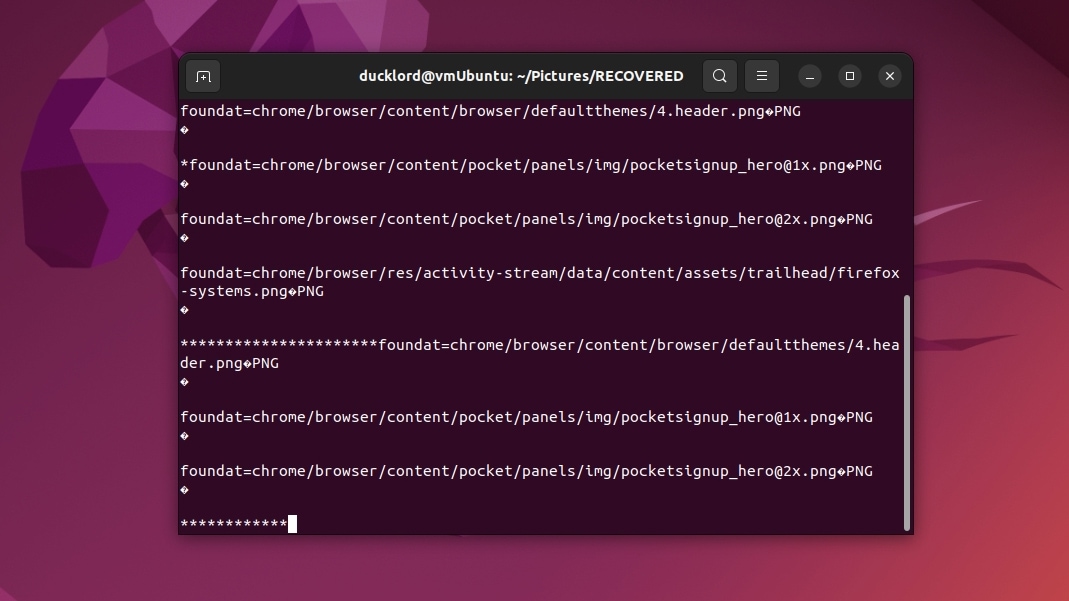
- When it’s done, you will find all the files it recovered within that folder.
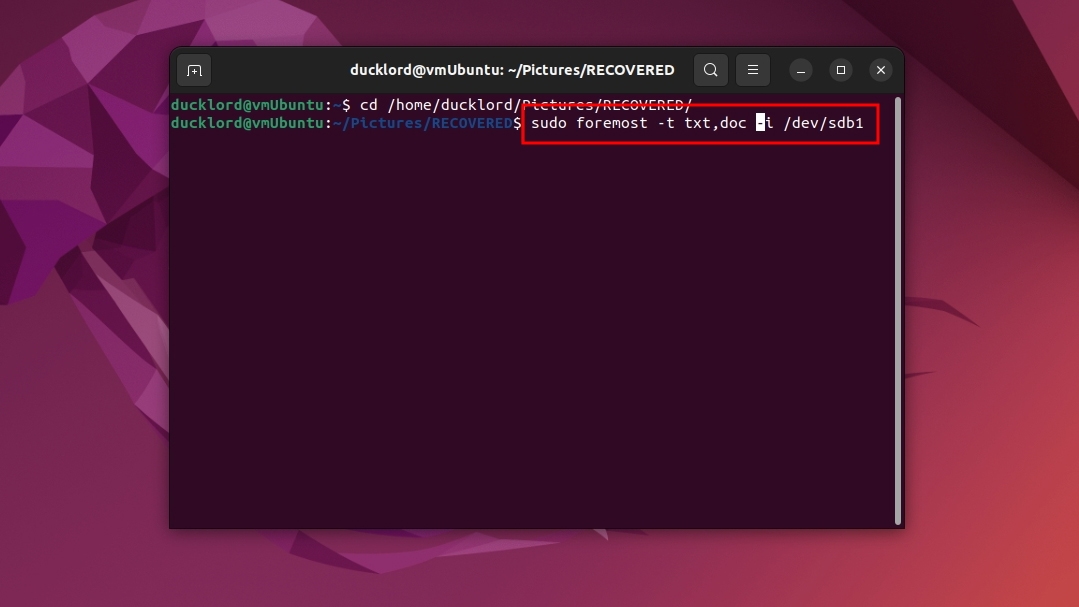
- By default, Foremost will try to save every lost file it locates. Do you only want to undelete Linux files of a particular file type, for example, txt and doc files? Instruct Foremost only to seek specific file extensions using the “-t” flag, like sudo foremost-t txt,doc -i /dev/sdb1.
Other Notable Tools For Linux File Recovery
Linux is known for offering many solutions for any task, and data recovery isn’t an exception.
Thus, if you’d like more alternatives with which you can recover deleted files on Linux, the following are some of the most popular and trusted solutions worth checking out.
- Mondo Rescue is one of the most powerful data recovery solutions. Mondo Rescue supports various storage devices, from tapes to optical media, many popular file systems, RAID setups, and much more.
- DDrescue was designed as a fully automatic data recovery solution. The app allows you to recover data from any storage device detected by the Linux kernel without micromanaging the process. Unlike many of its peers, DDrescue can prioritize the “most recoverable” data to ensure you get as many files as possible from a failing device.
- Extundelete, as its name suggests, specializes on can recover files on Linux that were stored using an EXT file system. It can recover both the contents and the filenames of lost files and is very fast, thanks to using the filesystem’s journal instead of scanning the whole storage before recovery.
- R-Linux: r-tool technology’s solution for Linux distributions is fast, reliable, and relatively user-friendly. However, it only supports the EXT family of file systems.
- Scalpel: An advanced data recovery solution, Scalpel is actually a “file carving and indexing” solution. Thanks to its support for multithreading and asynchronous I/O, it’s blazing-fast, and can even take advantage of the GPU to further boost its performance.
- The Sleuth Kit compiles many tools in one package to enable the analysis of volume and file system data. It’s not designed for working with storage devices but with disk images, and it can also be helpful when trying to recover data from them. Autopsy is, in many regards, more than a simple GUI for The Sleuth Kit mentioned above. It’s presented as a complete digital forensics platform, offering easier but thorough access to The Sleuth Kit’s tools, useful not only for recovering files but also for locating the cause of data loss. It’s worth noting that, as stated on its official web page, it’s also used by law enforcement, military, and corporate examiners.
- Libguestfs is one of the most powerful and versatile tools for dealing with virtual machine disk images. It can be used not only to access their contents and help with their recovery but also to modify them, monitor their statistics, format and resize disks, create backups, and more.
- Raise Data Recovery is one of the few commercial data recovery solutions that natively support Linux. As a commercial app, unlike almost all alternatives on Linux, it comes with a price tag and limited support. However, it’s also much more user-friendly, targeted primarily at the average user, who doesn’t want to spend ages seeking information and fighting with a terminal to get a handful of precious files back.
FAQ
Normally deleted files are temporarily moved to the Trash folder for a user-configurable amount of time or until the storage space they occupy is needed to store new data.
Files removed using the rm-rf command or any other method that skips the Trash are immediately marked as gone, and their space as available for use by other files. In such a scenario, it’s crucial to act quickly: if they get overwritten, it will be impossible to get them back.
The term “Linux” refers to the Linux kernel, which doesn’t contain any “global” undelete functionality. However, some of the file systems it supports, like ZFS and BTRFS, support features like file versioning and snapshots, which can help when you want to get lost or old versions of recently modified files back.
Many people use the term “Linux” when talking about a particular Linux distribution, not considering how countless are available, each doing things differently, complementing the Linux kernel with various software applications. Most Linux distributions come with a desktop environment, which in turn (usually) comes with the equivalent of a Recycle Bin/Trashcan, that allows bringing back recently deleted files. Some Linux distributions also come with tools that can help when in need of recovering data, like TestDisk or ddrescue.
There’s no way to recover permanently deleted files – for that’s what “permanently” means. More often than not, though, files marked as “deleted” aren’t gone until they’re overwritten.
To get such files back using PhotoRec:
- Install PhotoRec with sudo apt install testdisk.
- Run PhotoRec with sudo photorec.
- Select the drive to scan from PhotoRec’s media list and pick the correct filesystem for it.
- Choose a destination directory for saving the recovered files, and start PhotoRec’s scanning process.
- When PhotoRec’s done, you’ll find your files in that folder.
The rm and, by extension, the rm -rf commands skip the Trash folder. However, you might still be able to use a data recovery solution, like DDrescue or Foremost, as an “undo rm” fix.
For example, to recover deleted files on Ubuntu using Foremost:
- Install Foremost with sudo apt install foremost.
- Create a folder where you want to store the recovered data, and “enter it” from your terminal (using the command cd /path/to/folder).
- Use sudo foremost -i /device/with/deleted/files to have Foremost scan that device for lost data and save all located files to the current directory.
Theoretically, it’s not possible to recover truly overwritten files on any operating system, including any Linux distribution. Practically, though, it’s possible if using an advanced system like BTRFS or ZFS.
That’s because those file systems write data following an alternative approach than their peers: Copy On Write. Whenever new data is written on a device using BTRFS or ZFS, it’s written on a new spot instead of overwriting and replacing the old iteration. Thus, it’s possible to “revert” files to a previous state, for even if they seem overwritten by new data, that “new data that replaced them” is not actually written over them.
Conclusion
As we saw in this article, it’s possible to recover deleted files on Linux. Many solutions can help you, from mostly automated apps to advanced forensic tools. Best of all, thanks to being open-source, most of them are free to use.
Still, many factors can affect the outcome of any attempt to undelete Linux files, like the method used for deletion, the underlying file system, etc. To maximize your chances of getting your accidentally deleted files back, act as soon as you realize they’re gone and not a minute later.
This article was written by Odysseas Kourafalos, a Editor-in-Chief at Handy Recovery Advisor. It was also verified for technical accuracy by Andrey Vasilyev, our editorial advisor.
Curious about our content creation process? Take a look at our Editor Guidelines.