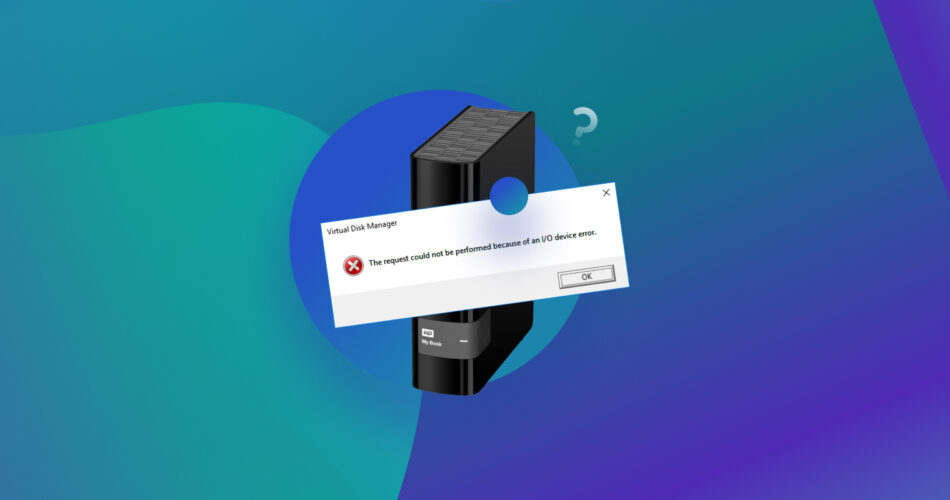
You’re probably here because you got a worrying error when trying to access your hard drive: “The request could not be performed because of an I/O device error.” Such I/O device errors can leave you feeling confused and anxious about your data’s safety. But don’t worry! In this definitive guide, we’ve dug deep and will tell you exactly how to diagnose and fix hard drive I/O errors effectively.
Whether you’re dealing with an internal drive or an external one, this article will provide actionable steps to fix hard drive I/O device errors.
Key Takeaways: When we started researching solutions to fix hard drive I/O errors, we quickly ran into SEO-optimized articles showing up as the first results on Google. These articles are designed to rank highly so they prioritize SEO tactics over accurate information. As a result, they often provide misleading or incomplete advice, leading to further confusion and frustration for you as a user seeking solid solutions.
The first thing to note is that you aren’t alone! The latest Reddit post we found related to this topic was just last year, and the earliest forum discussion we came across is more than 8 years old! What we’re trying to say is that users have encountered similar issues and discussed them on online forums such as SuperUser and Tom’s Hardware before.
Here’s the simple truth- If your hard drive is displaying repeated I/O errors, your disk is most likely beginning to fail, and it may be time to consider replacing it. While data recovery and repair can be temporary solutions, a failing hard drive is going to continue posing a significant risk to your data, even after repair. It’s crucial to secure your data as soon as possible and then consider replacing the I/O device error hard drive.
This article is going to be divided into two parts- In the first part; we’ll steer clear of all the internet nonsense and focus on the fundamental steps you should take to diagnose and resolve the I/O errors issue. In the second part, we’ll explore additional methods and alternative solutions we read about from various online portals that might still work for you.
Common Causes of I/O Device Errors and Where They Might Arise
Before we get into the proper steps to deal with I/O device errors, let’s look at what is an I/O device error and some common causes to understand the root of this problem.
In essence, I/O (Input/Output) errors occur when Windows is unable to read or write data to your drive. This often results in error messages, something like “the request could not be performed because of an I/O device error.” This issue isn’t limited to external hard disks, though, and could even occur on your laptop or PC’s internal hard drive.Additionally, this happens on many different types of media and storage devices. Let’s first look at the most common causes of this error:
- 🤖 Corrupted or outdated drivers: If your device’s drivers are incompatible or malfunctioning, this can lead to communication errors between the operating system and the hardware components, resulting in I/O device errors.
- 🔌 Faulty connections: This is one of the most common causes of external drive I/O device errors, but might even affect internal drives. Loose or damaged cables, connectors, or ports can interrupt data transfer, which will lead to I/O device errors when you try to use your disk.
- 🔨 Physical damage to the hard drive: Mechanical trauma to your drive, such as head crashes or disk platter damage, can cause the hard drive to become inaccessible, resulting in I/O device errors.
- 📁 File system corruption: Errors within the file system structure can hinder the accessing of data and lead to I/O device errors.
- 👾 Malware or virus infections: Lastly, security threats such as viruses or malware can compromise stored data’s integrity on your hard drive and cause I/O device errors while trying to read or write to your drive.
From the above list, it becomes apparent that both internal and external hard drives can have significantly different causes, and how to fix i/o device errors step-by-step will likewise be different. Why exactly? It mostly has to do with the connection type, portability, accessibility, and power source, which dictates what causes the I/O errors for different types of hard drives. Let’s look deeper into some key differences:
Internal Drives:
- 💾 Firmware issues: Your internal hard drive’s firmware can have bugs or glitches, which can cause I/O device errors.
- 🖥️ Operating system corruption: Your operating system can have software issues such as corrupted system files or registry entries, and this can lead to I/O device errors on internal drives.
- 🗃️ Partition table corruption: Damage to the partition table structure can result in I/O device errors, especially when you try to access specific partitions on the internal hard drive.
- ⚡Power supply problems: Fluctuating power supply to your internal hard drive can cause I/O device errors due to the power being insufficient for transferring data. This can be due to failing/aged components or even faulty internal connections.
External Drives:
- 🌩️ Connection problems: Issues with USB or other connecting wires, such as loose or damaged cables, are the most common cause of I/O device errors on external drives.
- 📀 Drive enclosure failures: If your external drive enclosure malfunctions (due to faulty circuitry or overheating), it can result in I/O device errors.
- 🫱🏼🫲🏼Compatibility issues: Let’s understand this with a simple example. Suppose you use a USB 3.0 drive with a USB 2.0 port, incompatibilities can occur. Always ensure there are no incompatibilities between the external drive and the host device, as this may cause I/O errors.
- 🎯 Physical damage: External drives are obviously more susceptible to physical damage if you drop it, or expose it to environmental factors. This mechanical damage can lead to I/O device errors.
An important takeaway is that these differences extend to the troubleshooting process. Trying to fix the I/O device error within an internal system disk often requires a very different approach compared to dealing with external storage devices. If your disk has problems with its partitions causing the I/O errors and is a system disk, your PC might not boot up; then, you’ll ideally need to connect the affected drive as an external disk to another computer for repairs. However, fixing this error on external disks might involve checking connections, ensuring proper power supply, and ensuring proper compatibility with the host system.
Moreover, certain methods and tools for resolving I/O device errors can have different effectiveness depending on whether your affected disk is internal or external. For example, common command-line utilities like CHKDSK and SFC (which we’ve explored in the upcoming sections) are typically used to repair internal disk errors by scanning and fixing file system issues. But CHKDSK can be useful for external disks too. And since SFC scans system and configuration files, if there are any corrupted file systems that are causing issues with connecting your external drives, SFC can help.
The Proper Way to Deal With I/O Device Error on a Hard Drive
And now, we’ll discuss the de facto “correct way” to deal with I/O device errors on Windows. As discussed in the previous sections, we’ve kept our methods simple and effective, and to help clear any possible confusion, we’ll also tell you which method works best for internal vs external disks.
Note: Keep in mind that most methods will require a bootable OS. If you are facing a problem with the internal drive and your system doesn’t boot up, you will need to connect it to another PC.
Step 1: Ensure Proper Connections
This is most often the simplest fix and should be the first thing you check for, especially if you have an external disk with I/O errors. Oftentimes, I/O device errors can be due to loose or faulty connections, damaged cables, or incompatible adapters. Here are steps you can take to ensure the problem isn’t connection-related:
- 🔌 Check physical connections: You should start by examining the cables connecting your hard drive to the computer. Ensure that both ends of the cables are securely plugged into their respective ports. With an external hard drive, disconnect and reconnect the USB or Thunderbolt cable to ensure your connection is secure.
- 🔍 Inspect for cable damage: Next, you should carefully inspect your cables for any signs of damage, such as frayed wires, bent connectors, or exposed metal. It may not be obvious, but even minor damage to the cables can lead to connectivity issues and I/O device errors! If you notice any damage, consider replacing the cables with new ones to eliminate this potential cause.
- 🔄 Try different ports and adapters: If you’re using adapters or enclosures to connect your hard drive to the computer, try using different ports or adapters to see if the issue persists. Sometimes a faulty port or incompatible adapter can be the culprit behind I/O device errors. Experimenting with alternative connection options might be a little more expensive, but if this fixes the problem, it will save you a lot of trouble later!
- ⚡ Check power source: Lastly, you should ensure that both your internal and external hard drives are receiving adequate power. If your external hard drive requires an external power source, check that it’s properly connected and receiving power (often indicated by an LED). Also, consider using a different power outlet or adapter to rule out power-related issues.
Step 2: Check Your Hard Drive’s Status
If all cable connections are secured and the I/O errors persist, the next step, if you want to know how to fix I/O device errors on Windows, is to check if your hard drive is working as intended. This step works for both internal system disks as well as external storage drives since it involves accessing your drive’s SMART data. Here are two ways to go about it:
1. SMART data analysis using CrystalDiskInfo
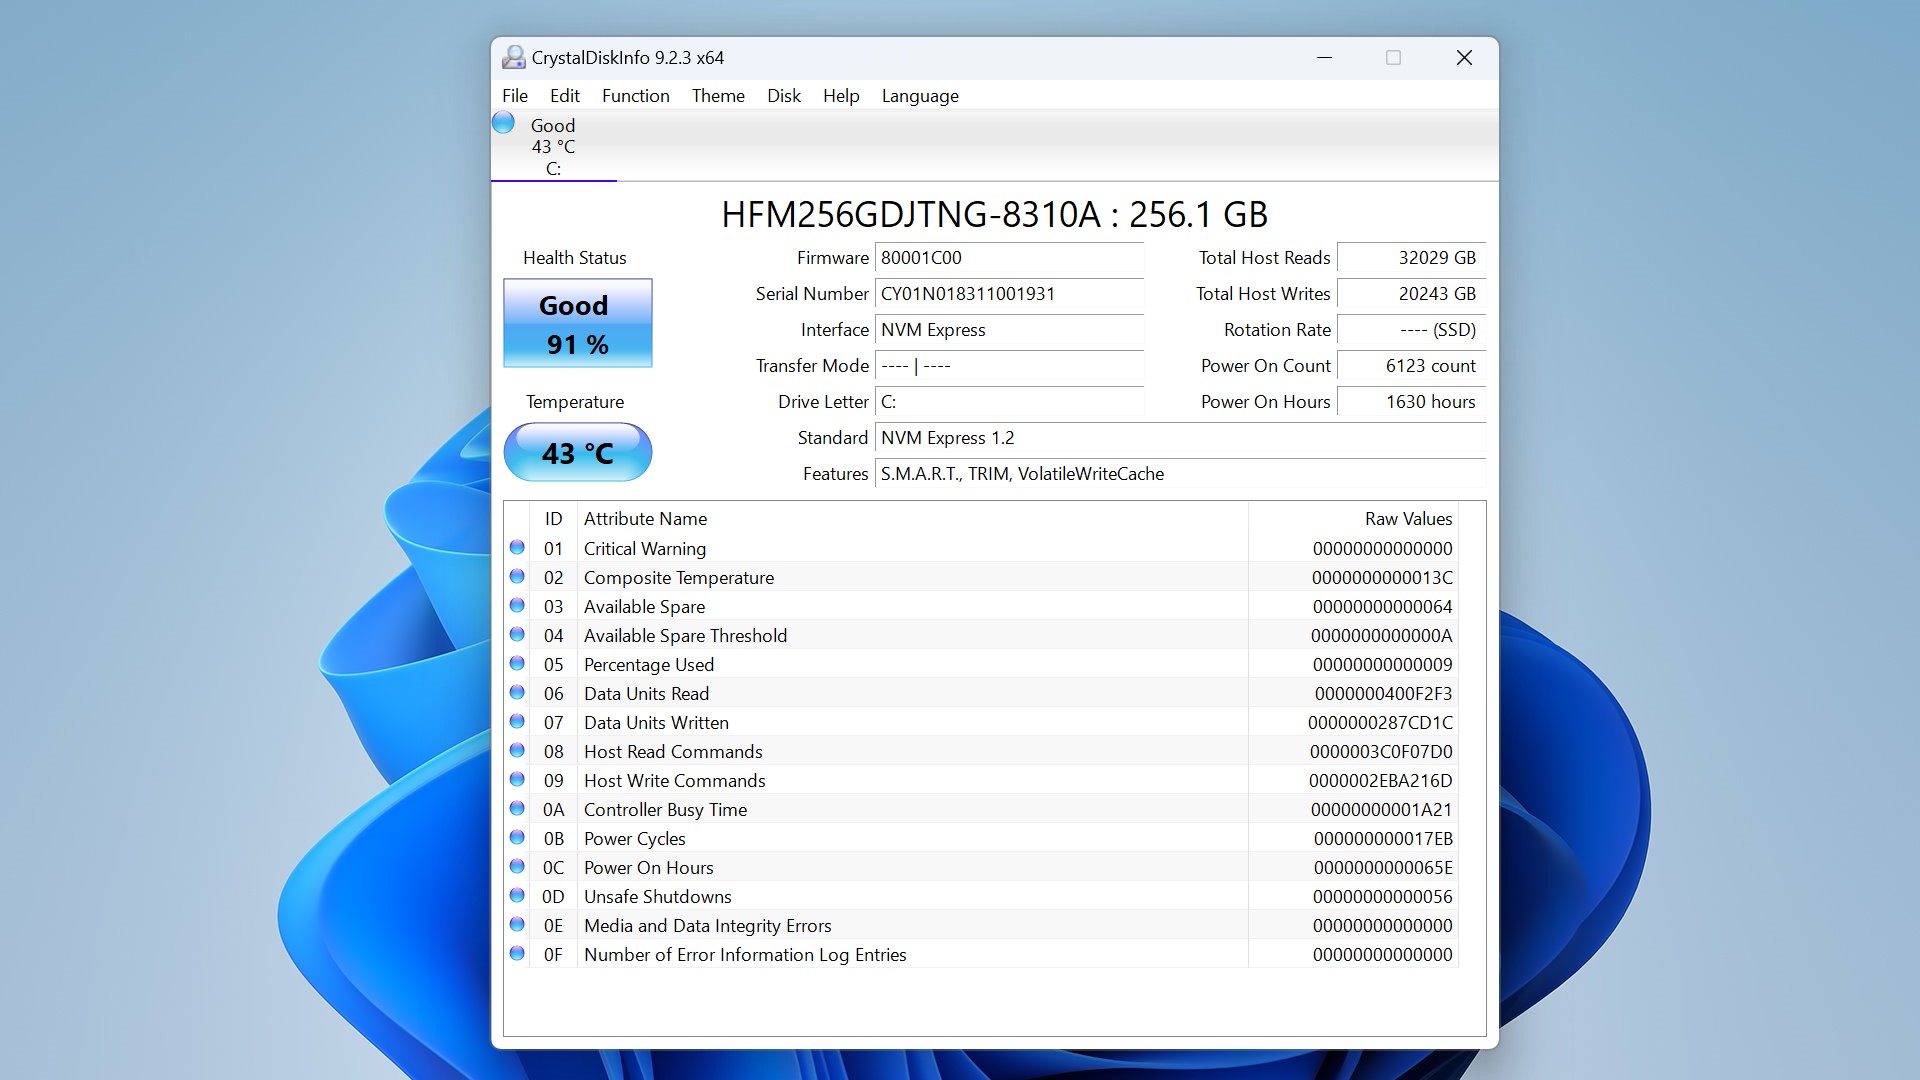
You can use free tools like CrystalDiskInfo to access the Self-Monitoring, Analysis, and Reporting Technology (SMART) data of your hard drive. This is a very convenient way to view SMART data, but there are other options using native Windows commands too. This data provides insights into the health and performance of your disk, including indicators of potential problems such as bad sectors, temperature fluctuations, and the overall lifespan expectancy of your drive. Here’s a useful YouTube video we found for using CrystalDiskInfo.
2. Disk Management review
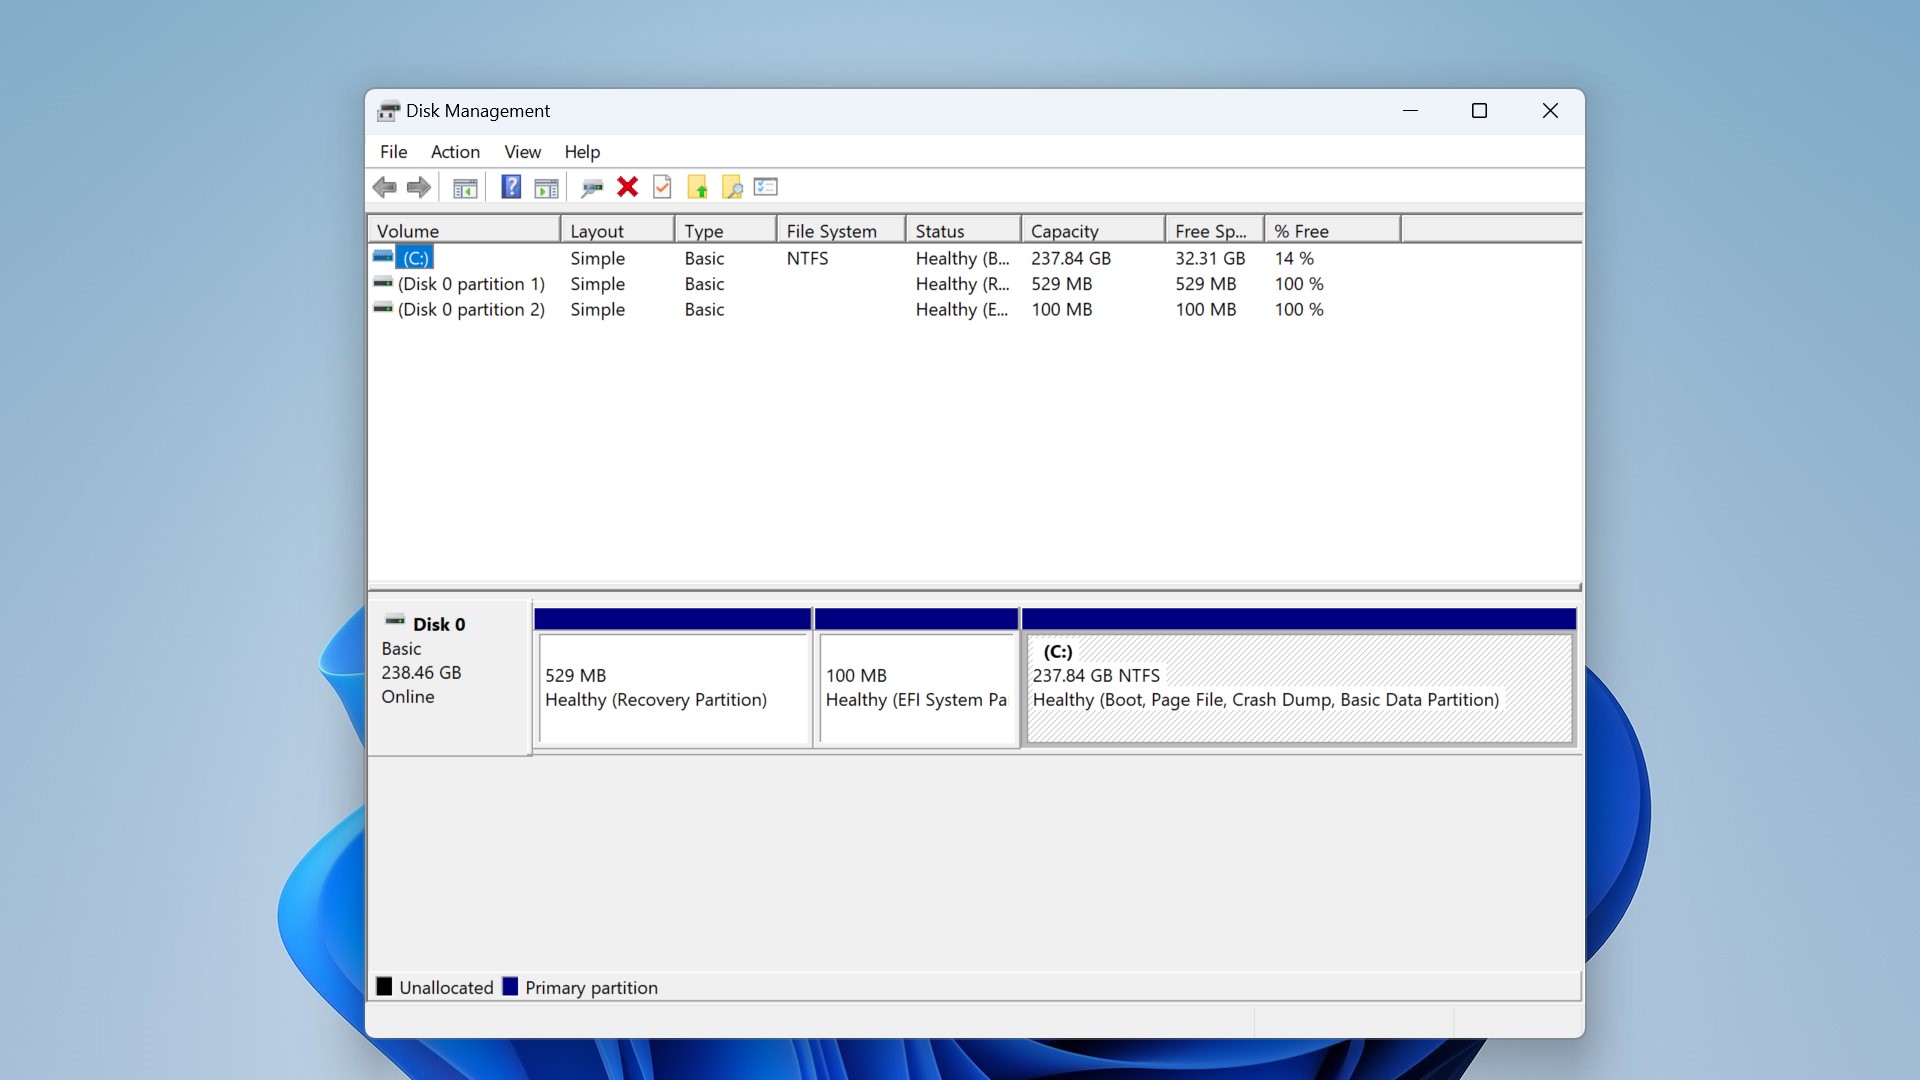
You can also consider using native diagnostic tools like Disk Management on your Windows computer to check the status of your hard drive. Other than partition statistics, it also shows the health status of the drive or partition (this could be “Healthy” or “Healthy (At Risk”)). To access Disk Management, right-click on the Start button and select “Disk Management” from the menu. Here, you should see the list of all connected storage devices, including their partitions, file systems, and health status. Here’s a video on Disk Management that goes a little more in-depth into this tool.
If there are SMART errors or bad sectors detected by these diagnostic tools, you’ll need to take preventive measures to avoid losing all your data. Here’s our comprehensive article on how to deal with such SMART errors on hard drives. But regardless of the diagnostic results, the next step remains the same- backup your files. So, let’s move on to Step 3 to see exactly how.
Step 3: Get Data Off Your Drive
Your drive has I/O device errors, and you’ve ruled out bad connections. The drive’s health has been checked, too. In case of I/O errors, it’s safest to err on the side of caution and assume you have a failing disk on your hands. Well, you now need to focus on backing up your data. You could simply copy and paste your files onto a working storage media, but another good option is to try creating a disk image.
Software like AOMEI Backupper and Disk Drill (which we’ve reviewed before) let you create disk images or clones of your disk’s data. This can help you create a complete backup of your entire disk, making sure that no data is lost in case your disk fails (which I/O errors can potentially lead up to). This requires you to have another healthy disk with free space to perform.
Disk Drill lets you create a byte-to-byte backup. Once completed, this byte-to-byte backup contains all the sectors from your original drive, even the ones that are marked as empty but may still contain valuable files to be recovered. This way, data recovery software can scan and analyze a complete copy of your original failing drive that contains the same set of potentially recoverable data. Another great advantage of this method when dealing with I/O device errors is that there is no threat to your data’s integrity. Because when dealing with a potentially failing drive, as I/O drives often can, even read-only operations can lead to data loss.
Data recovery software like Disk Drill essentially creates disk copies to then scan the copies rather than your disks themselves. The main purpose of this is to reduce the load on the scanned disk, but this approach also lets you find data on the disks- data that is still accessible (in cases of access issues), deleted or missing files whose records remain in the file system, and data that can be retrieved through their file signatures.
The default file type for backups created by Disk Drill is the DMG format, which is designed to be used with Disk Drill itself. Such a backup is created to secure all data (both existing and potentially recoverable) for cases when there is potential for your drive to fail and its health looks bad. So even though this byte-to-byte backup isn’t an ‘archive’ of your files, it can act as an image for data recovery software to use.
You can then restore the files from such a backup (although it requires a premium Disk Drill subscription). Disk Drill backups are specifically tailored for failing hard drives, especially for data that cannot be accessed using default methods. If you need free data backup software to just avoid the pain of manually copying and pasting files, use apps like EaseUS Todo Backup or AOMEI Backupper.
Here’s a quick guide for backing up and recovering your data using Disk Drill:
- Download and install the Disk Drill software.
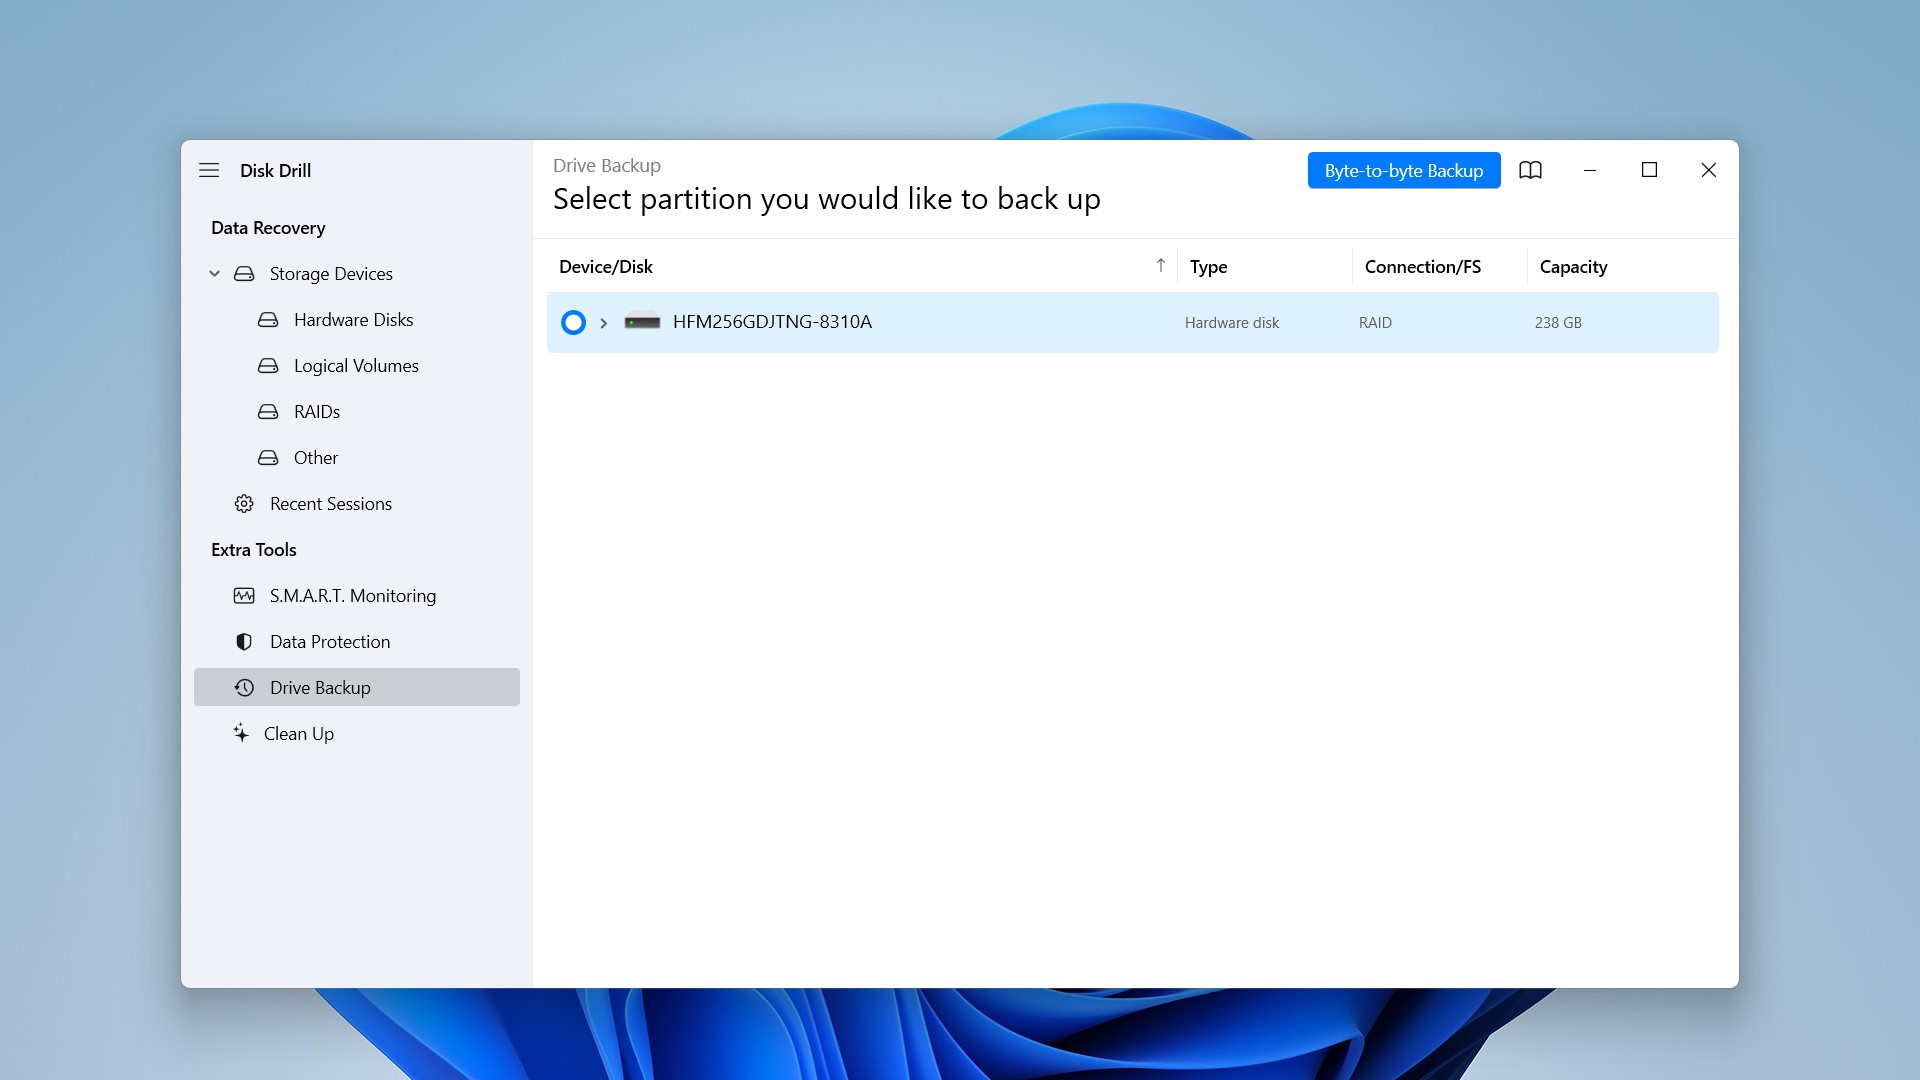
- Select Drive Backup from the Extra Tools window on the left. Now select the drive you want and click on Byte-to-byte backup.
- In the window that appears, you can choose a name and location for the DMG file to be saved. You can also set the start and end positions for the backup image in sectors or bytes. This can be useful if you know which area of the drive is damaged and would like to skip it. Disk Drill will now create a DMG image of your drive.

- You can now attach the newly created disk image as a source for data recovery. Choose Storage Devices from the left panel, then select Attach disk image… at the bottom of the window. Now select the DMG file we just created (You can also simply drag and drop the image file into Disk Drill).
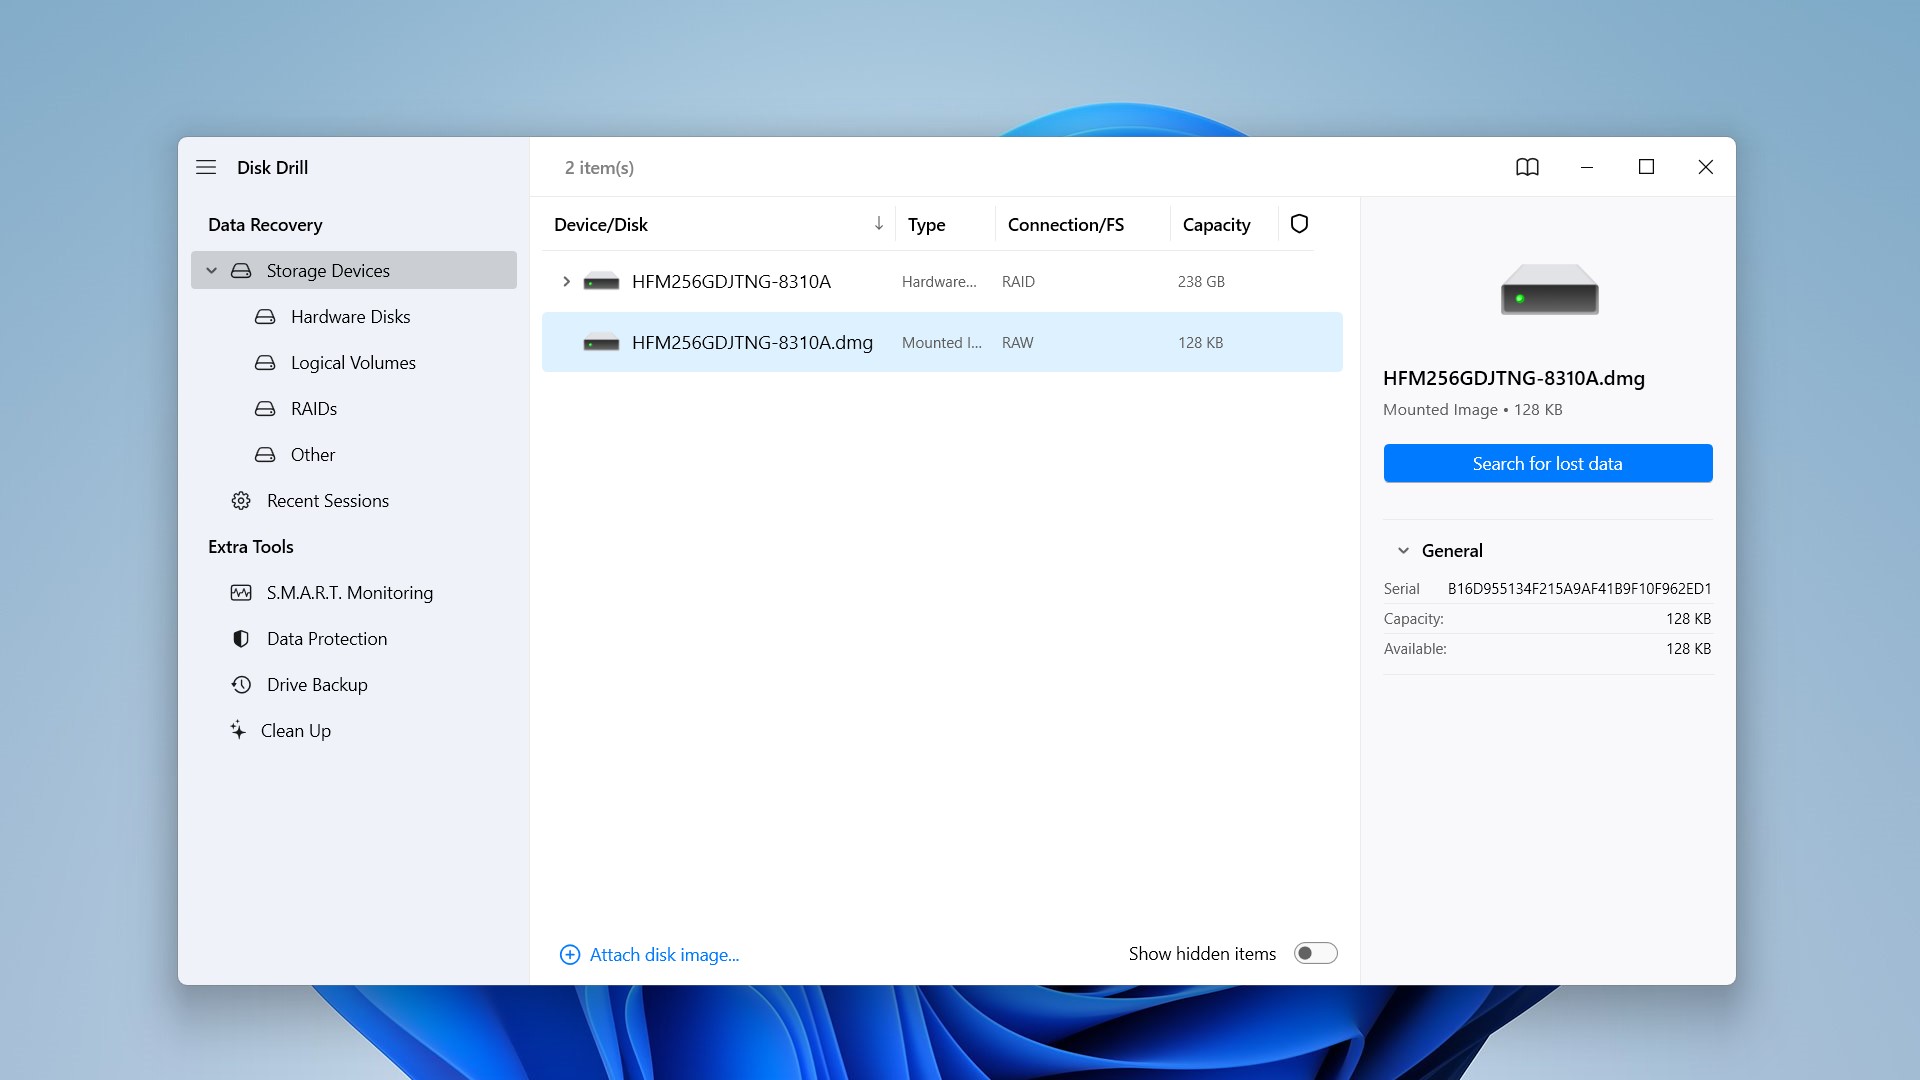
- Now click on Search for lost data. Wait for the scan to finish or begin previewing found files by clicking Review found items.
- Once you’ve selected your files, click on Recover. Your recoverable files will now get sent to your chosen location.
Step 4: Try to ‘Fix’ Your Hard Drive
After you have the peace of mind that your vital data is secured and backed up as a disk image, you can try to run some fixes to potentially fix the I/O device error on Windows.
Note: Even if the repair seems successful and the I/O errors stop, we advise against using this “repaired” drive as a system disk or for storing any important data in the future. The cause of the problem could still persist and lead to unpredictable future failures. Additionally, using any repair methods carries a chance of data loss, so ensure you attempt these repairs only after backing up all your files as we showed in Step 3. You can still use this repaired drive as a storage vault for miscellaneous files and other not-so-important data.
With that being said, here’s three ways you can try to fix the “request could not be performed due to I/O errors” issue on your hard drive:
1. Run CMD Fixes
A. CHKDSK

CHKDSK is Windows’s utility for scanning and repairing file system errors in your hard drive. This utility can potentially fix logical errors within your drive, which can resolve the I/O errors. As stated earlier, always proceed with caution since CHKDSK may inadvertently overwrite your data.
Here’s a simple guide to using CHKDSK for bad sectors and fixing them:
- 1. Open File Explorer on your system.
- 2. Click on This PC and right-click on the hard drive, which is giving you I/O errors.
- 3. Select Properties and then navigate to the Tools tab.
- 4. Under the Error checking section, click on Check. This will start the scan and check your drive for file system errors.
- 5. Click Scan Drive on the window that pops up. If any errors are found, you can choose to fix them accordingly.
Note that CHKDSK can only repair soft bad sectors (where data might be written incorrectly). If your hard drive with I/O device errors has hard bad sectors (due to mechanical damage), CHKDSK simply marks them as unusable. Read our full guide on how to use CHKDSK for more information.
B. SFC
System File Checker (SFC) is another command-line tool that scans and repairs corrupted system and configuration files. By running SFC on your system, you can address any file integrity violations that may be causing the I/O error to occur. The command is rather easy to run on your system disk by using the command prompt, and here’s a nifty YouTube video that shows exactly how you can use SFC.
2. Use Victoria
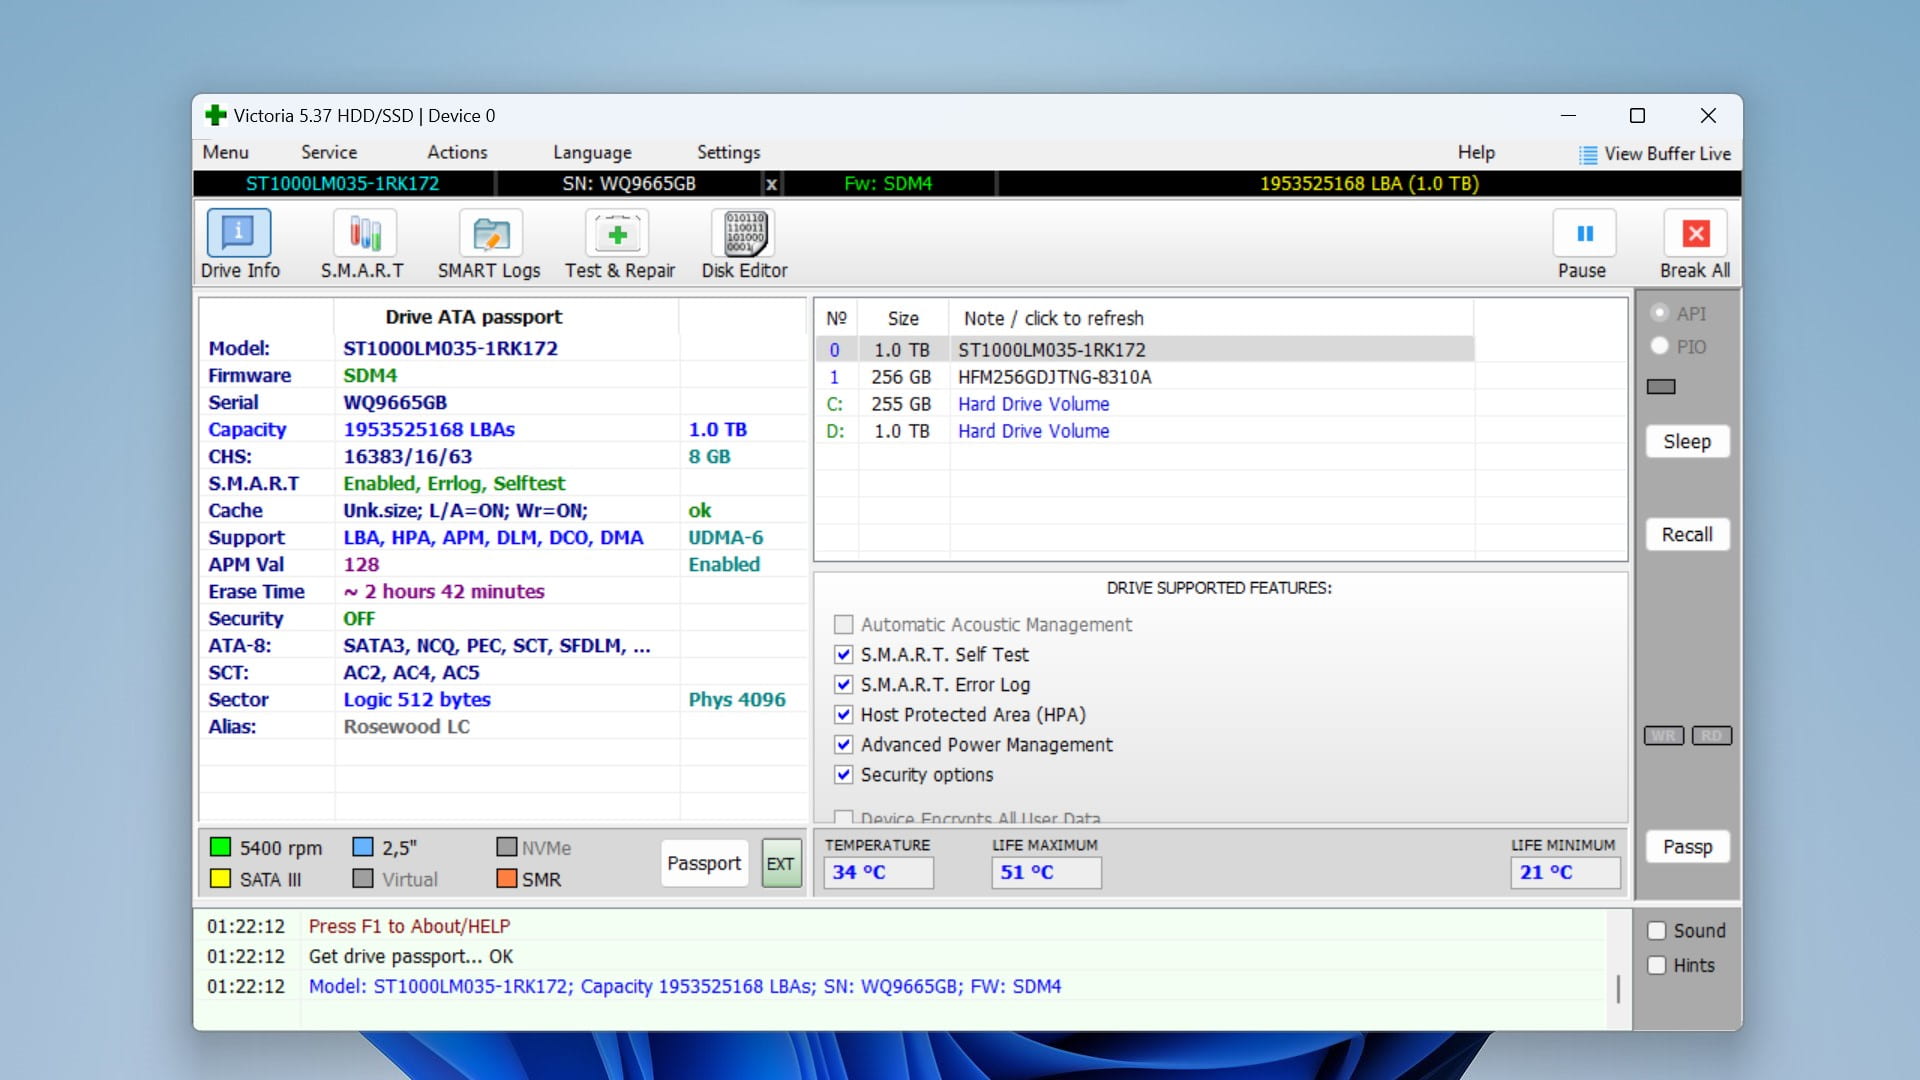
Victoria is a powerful diagnostic tool that can let you assess your hard drive’s health and performance. Using tools such as this requires a little more knowledge, but by using Victoria, you can check for bad sectors and SMART data to see if your drive is failing or needs to be repaired/replaced.
More so, this software has tools for drive cloning, benchmarking, low-level formatting, and partition management, as well as identifying and remapping bad sectors on your drive. This means it can identify and mark bad sectors on your disk to prevent data loss, and after scanning your hard drive’s surface, it can remap, erase, and possibly restore data when errors are spotted (Do note that remapping replaces bad blocks with spare memory blocks without preserving the data).
Once again, it comes with a risk of data loss if used incorrectly, and we don’t recommend it if you don’t know what you’re doing. If you’re still determined to attempt a repair using this software, try using this YouTube tutorial we found on Victoria.
3. Full Format Your Drive
Sometimes, a fresh start can help resolve unseen errors with your hard drive. It goes without saying a full format completely erases the data stored on your storage device, so only perform this after properly backing up all your files. A full format also initiates a search and correction of bad blocks. This method works well for external drives, although it can be used to fix I/O errors on internal disks as well. Here’s how to format your drive:
- Open Disk Management by right-clicking on Start.
- Locate the hard drive you want to format and right-click on it.
- Select “Format.” Now choose the file system and allocation unit size. Also, ensure that “Perform a quick format” is unchecked (to ensure a full format).
- Confirm your settings and initiate the formatting process. You will now have to wait for formatting to complete.
Additional Solutions to Fix I/O Device Error
In addition to our primary methods in the previous section, there are several additional solutions you can try to resolve the I/O device error. We’ve seen these methods being discussed online frequently, and they might prove to be helpful in certain scenarios. However, it’s essential to exercise caution as some may involve potential data loss.
- 🔄 Restart your computer: Sometimes, a simple restart can resolve temporary glitches that may be causing the I/O device error on your drive. You can do this by clicking Start>Power>Restart on Windows.
- 📥 Confirm driver integrity: As we discussed in the “Causes of I/O errors” section above, outdated or malfunctioning drivers can cause I/O errors for both internal and external hard drives. You can manage these drivers through Device Manager or by visiting your particular device manufacturer’s website. Here’s three things to try:
- Update Drivers: Firstly, try updating your drivers to the latest version if they aren’t.
- Rollback Drivers: This can be especially useful if you notice that I/O issues started after a driver update, so you can try rolling back to a previous version of the device driver.
- Uninstall/Reinstall Drivers: And if those two methods don’t work, a clean reinstall of drivers might fix the issue.
- 🔠 Change the drive letter: In some cases, the Input/Output device errors could be because of conflicting drive letter names. Changing the drive letter of your affected drive may help resolve the I/O device error.
- 🛡️ Run your PC in Safe Mode: Running your PC in Safe Mode is a troubleshooting method that basically starts your computer with only essential system programs and services. For internal drives especially, Safe Mode is highly beneficial as it helps isolate software conflicts and identifies any malfunctioning drivers or programs that may be causing the I/O device error. Click on the Start Menu: Press the Windows key on your keyboard or click on the Start button located at the bottom-left corner of your screen. Here’s the official Windows guide on how to do this.
- 🧹 Perform a clean boot of your Windows: Like the Safe Mode method, this solution is primarily beneficial for internal drives to isolate software conflicts, although it canalso help diagnose issues with your external drives. Here’s a simple guide to clean boot your Windows system.
- 🔍 Scan your system for viruses and malware: You might have recently downloaded files from shady websites or suspect other malicious software could be causing the I/O device errors. In such scenarios it’s a good idea to rule out viruses by performing a thorough scan of your system using antivirus software. Here’s how to run a malware scan with Microsoft Defender.
- 🔙 Change the transfer mode for the drive: Incorrect transfer mode settings for your drive can also lead to I/O device errors. Adjusting these settings involves changing how data is transferred between the drive and your computer’s operating system. Here’s simple steps that we found on a forum to change the transfer mode.
- ⏪ Use system restore: And lastly, if you noticed that the I/O errors occurred after recent system changes (like software updates), you can use System Restore to revert your system to a previous state when the disk was connecting without problems.
Conclusion
I/O device errors can occur on both internal and external hard drives. We’ve done our best to steer clear of the SEO-laden articles with incomplete information often found in online searches. If you read our guide step by step, you’ll clearly see the correct methods delineated from the misleading internet clutter.
Remember to always treat a device with I/O errors as if it were failing, and start by backing up all important data. You can then try simple fixes as well as more complex repairs while noting that the repaired drive should still be used cautiously.
This article was written by Vihaan Jain, a Staff Writer at Handy Recovery. It was also verified for technical accuracy by Andrey Vasilyev, our editorial advisor.
Curious about our content creation process? Take a look at our Editor Guidelines.